
How to Easily Create a Dutch Door Spread (Bullet Journal)
We are talking about how to create a dutch door in your bullet journal and why it’s a useful layout to add. This method also has a few downfalls to consider so be sure you know about those before you take a knife to your journal.
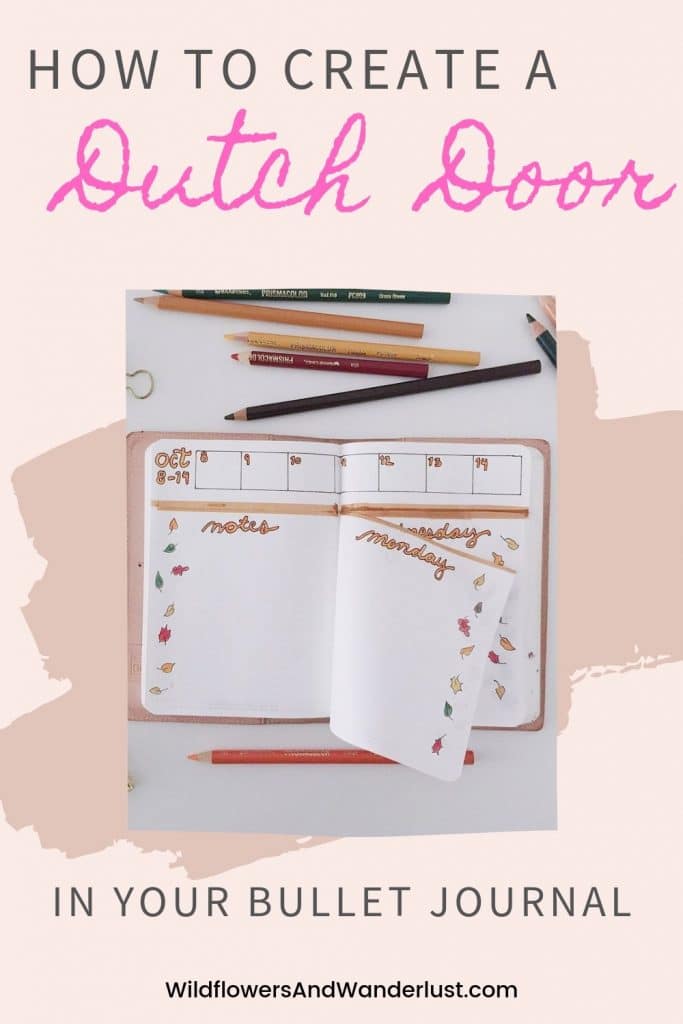
Weekly Spread Using the Dutch Door Method
Now that I’ve been using my bullet journal for a bit I’m figuring out all kinds of ways to improve it.
I’m also researching how other people make their bullet journals more efficient, and boy there are so many creative ideas to look at.
For awhile I have felt like I needed more space in my weekly calendar. I need to find a way to add space, but still keep it efficient and not too spread out.
Of course I took my case to Pinterest to see what solutions I could find.
A lot of Pinterest and a little research…..
Please tell me I’m not the only one that goes to Pinterest looking for one idea and winds up far far away from where I started searching?
Well, back to the dutch doors…..
I researched all kinds of weekly spread ideas and I came across a method called the Dutch Door spread.
I tried to find out where it came from, and I have no idea who first created this method but I absolutely love how it works!
What is a Dutch Door?
In a house, a dutch door is a door that’s split so that one half can open while the other half is secured. In houses, these were an early solution to a window – you could open the top half of your door and have a nice breeze. The bottom half of the door stayed secure to keep the critters outside.
Or inside in the example above.
The same thing applies to your bullet journal.
You create a portion of a page that remains stationary and another portion that turns as usual. I know it sounds really confusing when you’re reading it but the pictures really explain it better.
Like everything creative – there are as many ways to design and use the dutch door as you can think of, so I’m going to start by showing you a few ideas so you can picture them.
Then we’ll talk about how to design yours, how to use it and why it’s effective.
If you haven’t started your bullet journal yet get all the details here!
~This post may contain affiliate links. If you click one and make a purchase, I may receive a commission at no additional cost to you. This helps us fund creating great content for you! For more information click here ~
Horizontal Dutch Door Spread Ideas
Let’s dive right in and start off with a few examples so you can get your mind around what a dutch door spread really looks like and how it works.
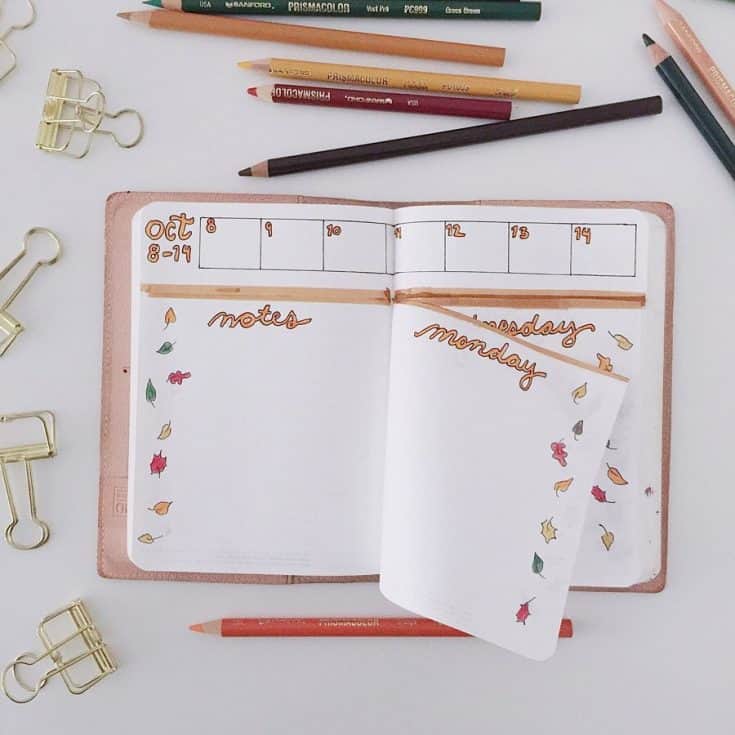
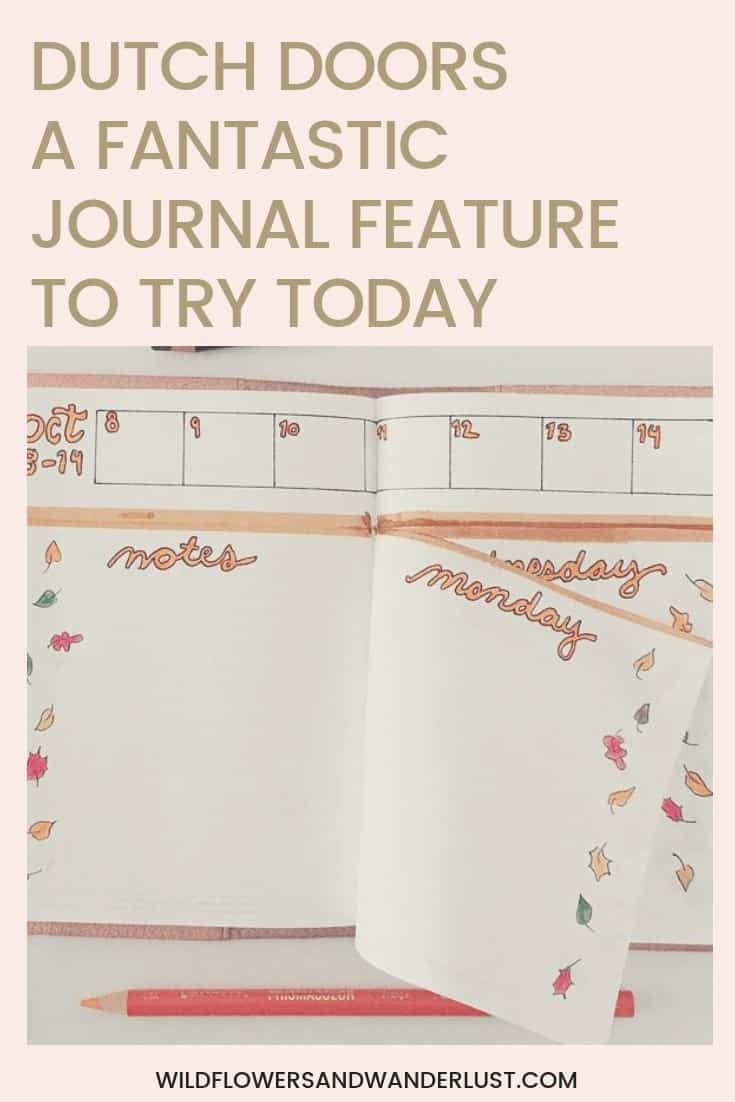
This is a great example of a horizontal dutch door. When you use this method you will have to cut out a section of your pages to make it work. This example is a monthly spread with the week exposed underneath.
This way your monthly calendar will show on top of your weekly dates, even when you turn the pages.
This is by far my favorite way to use a dutch door! It gives me a calendar above my week and actually makes my weekly calendar work better.
Vertical Dutch Door Spread Ideas
Here are some example’s of vertical dutch door’s.
When you use the dutch door vertically you can just fold your page in half.
You don’t have to cut or remove any pages so it feels a little less risky. The inside fold can be used for things that you want to keep private – like a gift list or period tracker.
This seems like a less risky way to “sample” a dutch door spread in your bullet journal and make sure you like the way it works.
And keeping a secret page folded inside is a great idea in any journal!
This is another example of a vertical which keeps your to do list and notes exposed while flipping the daily calendar pages.
Decorative Dutch Door
This cut out is more of a decorative separation for the journal. It can be used as a bookmark, or one side of it can be decorative and the other can be a list tracker.
This is also a great way to bookmark a new month, or new event, or anything that you want to be able to flip to quickly in your bullet journal.
Here’s one as a monthly marker and it’s so pretty.
It’s like having a pretty little bookmark!
And this one is just a magical creation!
All of Isabella’s designs are amazing. She is definitely an artist in her bullet journal but we can all use the inspiration to make our bullet journals better.
Dutch Door Supplies
You really only need your regular bullet journal supplies and a way to cut the pages to make a dutch door spread. Here are the supplies that we recommend:
- Bullet Journal – you’re going to need a journal or notebook of some sort if you don’t already have one. Of course we recommend the Leuchtturm bullet journal because it’s our favorite!
- Craft Knife – we prefer using a blade instead of scissors to make our dutch door cuts.
- Pencil – to draw your cut lines.
- Pens – check out our favorites.
- Any of your favorite embellishments that you use in your bullet journal – washi tape, stickers, colored pencils or glitter markers.
If you’d like to print out or bookmark how to make a dutch door spread here are the instructions!
Weekly Dutch Door Spread for your Journal
Add space to your journal with vertical and horizontal dutch door spreads in your journal.
Materials
- Journal
- Favorite markers or pens
Tools
- Ruler
- Scissors
- Pencil
Instructions
- Start by opening your journal to an area of blank pages.
- Decide how tall you want your weekly overview to be - it's going to show across the tops of your daily pages. You don't want it to be too tall, but you need to be able to read and write on it so generally 1 1/2"-2" is a good rule of thumb.
- Use your ruler to draw a straight line across the spread of pages - this is going to be your weekly overview. (you'll be cutting the tops off these pages)
- Use your pencil to label your pages with the days of the week. Since there are 7 days in the week and we're using 8 pages you'll have a bonus page. You can use it for a title page, doodles, note, whatever you'd like. I like to make mine a pretty title page.
- If you start your week on Sunday just write that in the middle of the 2nd page in pencil. You'll be erasing this after, it's just for a guideline. Pencil in the rest of the days on the following pages. So you're first left page would be title, then Sunday, then Monday, etc.
- When you're finished with this you should have a total of 8 pages (1 per side) - one for each day of the week and your bonus page.
- Gather the pages in between your first and last. You won't cut the first and last pages, just the ones in between, so your title page stays intact, and your last page (Saturday or Sunday depending on your calendar) stays whole too.
- Cut along the horizontal line that you drew in the first step. You will cut all the way to the spine of your journal. (don't worry, nothing bad is going to happen!)
- Once you reach the spine you'll have to rotate your journal to cut along the spine and remove the top portion of the pages.
- Now you have an exposed area at the top of your pages for a weekly overview - yay! It should stretch across your week. Go ahead and draw in your weekly overview at the top.
- Now you can add in your daily titles on your pages. Just erase the penciled in days and decorate to your heart's content.
- Success - now you have a weekly overview across the top of your week for reference!
Tips for Cutting Your Dutch Door
For your first dutch door you might want to try a vertical fold to see how it works.
When you’re ready to commit to cutting your journal we’ve got a couple of tips for you.
Because cutting out pages of your journal is pretty scary!
You can use scissors to cut across your lines but a craft knife will give you a lot more precision to get closer to the spine. It will also give you a much cleaner cut.
Be careful not to cut through the binding. You’ll want to leave a small edge to keep your pages attached.
By cutting to close to the binding it can loosen the opposite page, and that means that you’ll lose pages further into your bullet journal that you might not have wanted to remove. It might not be a problem in a blank journal but you sure don’t want to lose pages that you’ve already filled out!
Why the Dutch Door Spread is Effective
While I have mostly focused on the dutch door weekly spread, there are countless ways to use the dutch door spread.
It is a great way to provide an overview area of your journal. Of course this works well for a weekly or monthly calendar and keeps you from having to draw it in on multiple pages.
Of course your journal is as unique as you are so there are endless ideas on how to use these.
More Dutch Door Ideas
There are also endless ways to design a dutch door, you can make a cut vertically down your page and use it as an index.
You can fold a page over and use it for secret information or as a bookmark for a place that you turn to often in your journal.
You can cut out horizontally and make a monthly calendar across the top or bottom. Then add in your weekly or daily calendar in the center pages.
You can also use your dutch door purely for decoration. That’s the beauty of bullet journaling.
Want to know how to make your bullet journal even more effective? Check this out!
Why I Love the Dutch Door
My favorite thing about the dutch door spread is that it has given me more space to work with.
It does sound crazy by telling you to cut out part of your pages to create more space.
I guess a better way to describe it would be it has helped me to better organize my planner. Now I have a monthly overview and more day planning space.
The dutch door spread is also effective because it’s completely customizable.
That’s the bonus of all things bullet journal related. It can be updated each time I make a new one, and I can try things out to see what system works best for me and the way I plan.
Why You Shouldn’t Use a Dutch Door Spread
There is one issue about the dutch door spread that you may not like.
It’s hard to tell how this will effect your journal until you’ve already started using it so I just want to point it out.
You are removing sections of paper from your journal. This can make your journal uneven or it can make the surrounding pages a bit more vulnerable to wrinkling (if you keep you journal stuffed in a purse or bag like I do). It will create a sort of ridge on the surrounding pages.
The only way I’ve found to overcome this is to alternate my overview.
Sometimes I locate it at the top and sometimes the bottom. This doesn’t completely solve the problem but it helps spread it out a bit and it also changes things up inside my journal.
Overall I’ve found that the reasons for using the dutch door spread far outweigh the reasons not too. It’s been a great way to add more organized space into my calendar.
Hopefully we’ve shown you some ideas and given you enough inspiration to try this for yourself!
Don’t be afraid to personalize your bullet journal anyway that makes it work better for you.
Do you already have a dutch door spread in your journal?
Share a link in the comments below so we can check it out. We always love to see your projects and inspiration.
Follow us on Pinterest and on Instagram for lot’s more ideas and inspiration!
And be sure to save a pin to your favorite board so you’ll be able to find it later!


Good site! I truly love how it is easy on my eyes and the data are well written. I’m wondering how I could be notified whenever a new post has been made. I have subscribed to your feed which must do the trick! Have a great day!
Thanks so much for checking out our site and we’re glad you liked it. If you fill out the form in the sidebar you’ll e subscribed to our newsletter and then you’ll receive updates!
An outstanding share! I’ve just forwarded this onto a
friend who was doing a little homework on this. And he in fact
bought me lunch due to the fact that I stumbled upon it for him…
lol. So let me reword this…. Thank YOU for the meal!! But yeah, thanks
for spending some time to discuss this issue here on your website.
This is really interesting, You’re a very skilled blogger.
I’ve joined your feed and look forward to seeking more of your magnificent post.
Also, I have shared your website in my social networks!
Thanks for the share and we’re glad to have you following!
WildChild
Way cool! Some extremely valid points! I appreciate you writing this article and the rest of the site is very good.