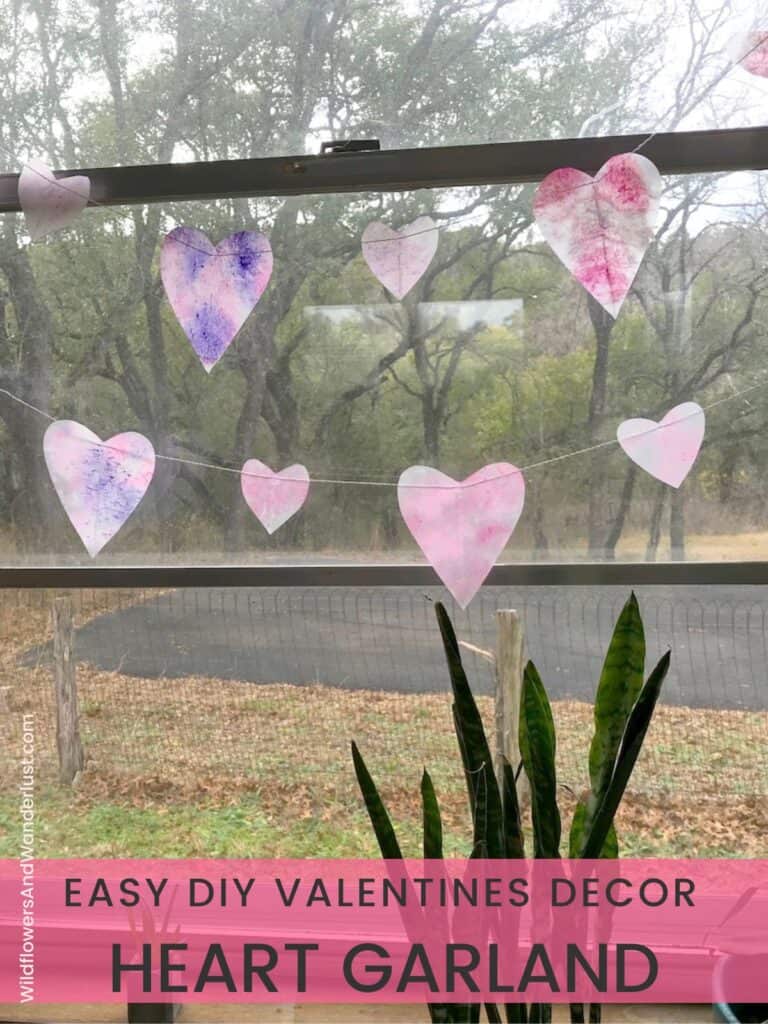
Valentine Heart Garland that is Fun and Simple
Here’s a quick and easy Valentine heart garland that you can whip up in no time! This is a great project to work on with kids and we think you’ll enjoy the low budget of time and materials that it requires.
Make A Pretty Valentine Heart Garland For Your Decor
We love decorating for Valentine’s Day.
Well, we really love any excuse to decorate or redecorate. If it involves a craft or DIY style project then it’s even better.
The bright pink and red colors are the biggest bonus of Valentine’s Day. They sure add a nice pop to the house at a time of year that can be rather gray. I mean pink is really one of my favorite colors anyway. At least I’ve got an excuse to spread it all over the house.
This is a valentine heart garland that you can make for yourself, or easily involve your kids in making. They’ll be delighted by the melting crayons and the pretty patterns it makes. It’s a great project to make in an afternoon and you probably already have all the supplies on hand!
This project might remind you of your childhood. That smell of the crayons and the smell of them melting, well it’s probably a teacher’s nightmare!
~This post may contain affiliate links. If you click one and make a purchase, I may receive a commission at no additional cost to you. This helps us fund creating great content for you! For more information click here ~
Supplies You’ll Need
You’re only going to need a few supplies to make a Valentine Heart Garland and if you’ve got kids then I’m betting that you’ve already got them on hand.
- Wax Paper (not parchment paper)
- Crayons
- Scissors
- Pencil Sharpener
- Iron and Ironing board or other heat proof surface
- String of your choice for hanging
If you have crayons that are almost used up those are the best ones to use. This is a great project to keep those little nibs from going to waste.
How to Make a Wax Paper Heart Garland
Cut Out Your Hearts
We started off by cutting hearts out pieces of wax paper. We cut all of ours into a few different sizes.
To make the garland you’ll be layering one heart over another so it will take two heart shapes per heart for your garland.
If you remember making paper hearts in school you know that the easiest way to cut a heart is to fold it in half to make the sides match. Since we are layering one heart over another, you don’t have to worry too much about them matching up perfectly. You can easily trim them once they are finished.
If you would like a stencil for your hearts, just print out our template with the link below and place it behind your wax paper as you cut. If you’re making this project with your kids the stencil might be an easier alternative.
Once you’ve cut out a few hearts it gets much easier to find the curve you like. Remember that your hearts don’t all have to match either. It’s art!
VALENTINE’S HEART GARLAND TEMPLATE | WildflowersandWanderlust.com

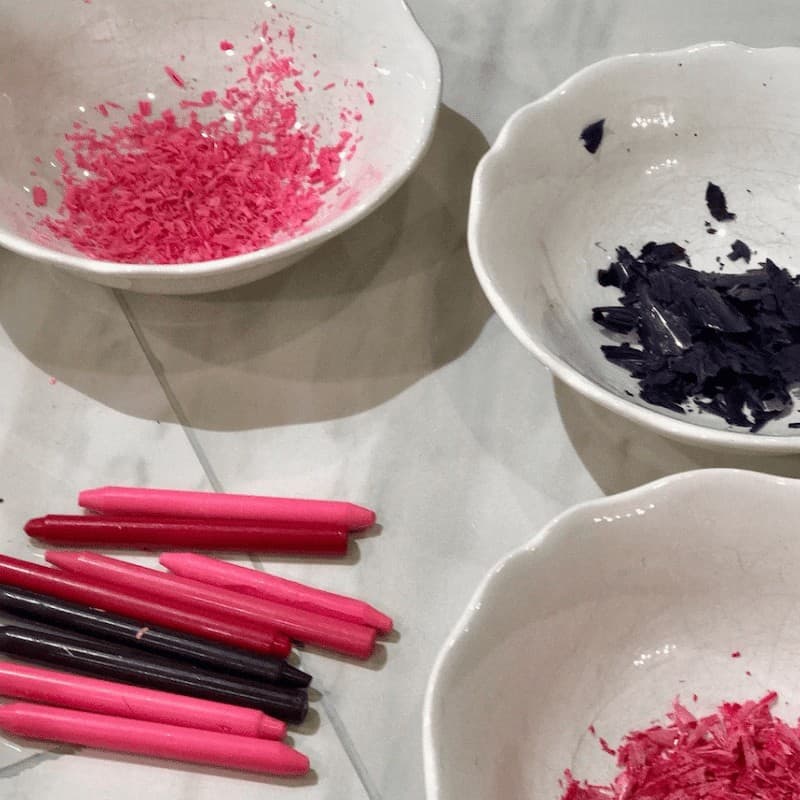
Shred Crayons
This is a great way to use up some old crayons. And I mean really old crayons. The ones that we used have been in a box in the barn for years.
Just peel the wrappers off the crayons and use a pencil sharpener to shred them into bits. This is an easy project for kids to do and they’ll love shredding crayons.
Alternatively, you can use a vegetable peeler or a knife to chop the crayons into small pieces.
Unless you’re making a mile of garland you probably only need one crayon per color. A little bit goes a long way when you’re melting them.
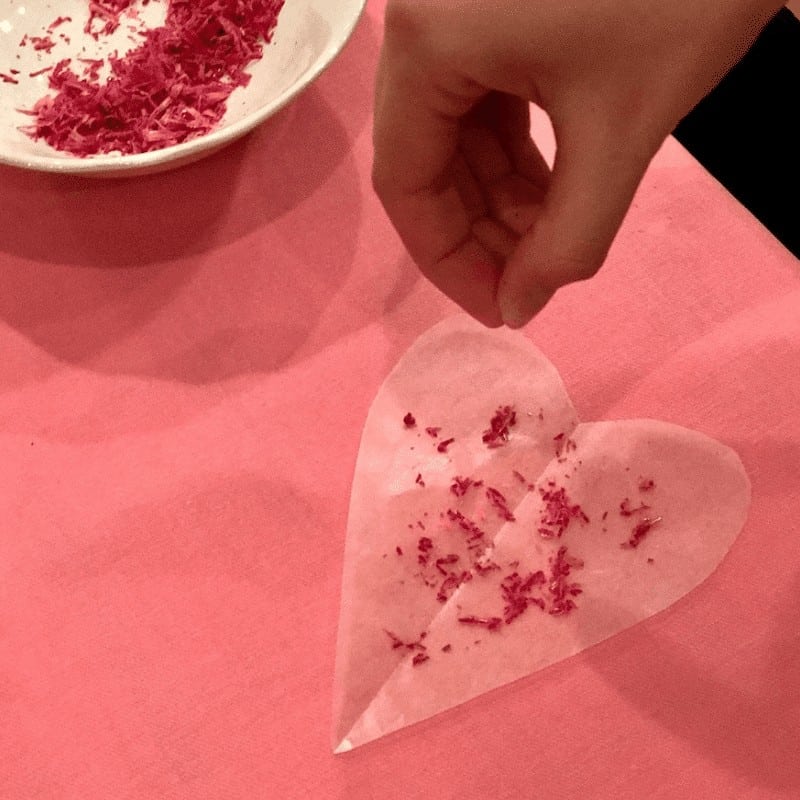
Sprinkle Hearts
You’ll want to set up your hearts in the spot that you’re planning to iron them because moving them with tiny crayon shreds can be pretty messy.
Be sure to put a piece of parchment paper or another thick paper under your wax paper hearts first. You’ll be using heat to bind the pieces together and you don’t want to melt them to your iron, or to the surface you’re ironing on.
If the crayon melts outside of your heart it can be a bit messy so be sure to protect the surface that you’re working on and your iron.
So basically you want a protected surface, then a heart. Layer the heart with shavings and layer another heart on top, then parchment paper for protection. It’s just a little layered sandwich.
Iron the Heart
Once you’ve got your layers use your iron to melt the shavings.
Set your iron to a medium heat, it doesn’t have to be super hot to melt the crayons and if it’s too warm it will scorch them.
Gently run the iron over your heart’s until the crayons melt, being sure that you don’t hold it in one place too long so that you don’t get scorch marks.
Then just repeat this process for each heart that you’re making.
Finishing up Your Valentine Heart Garland
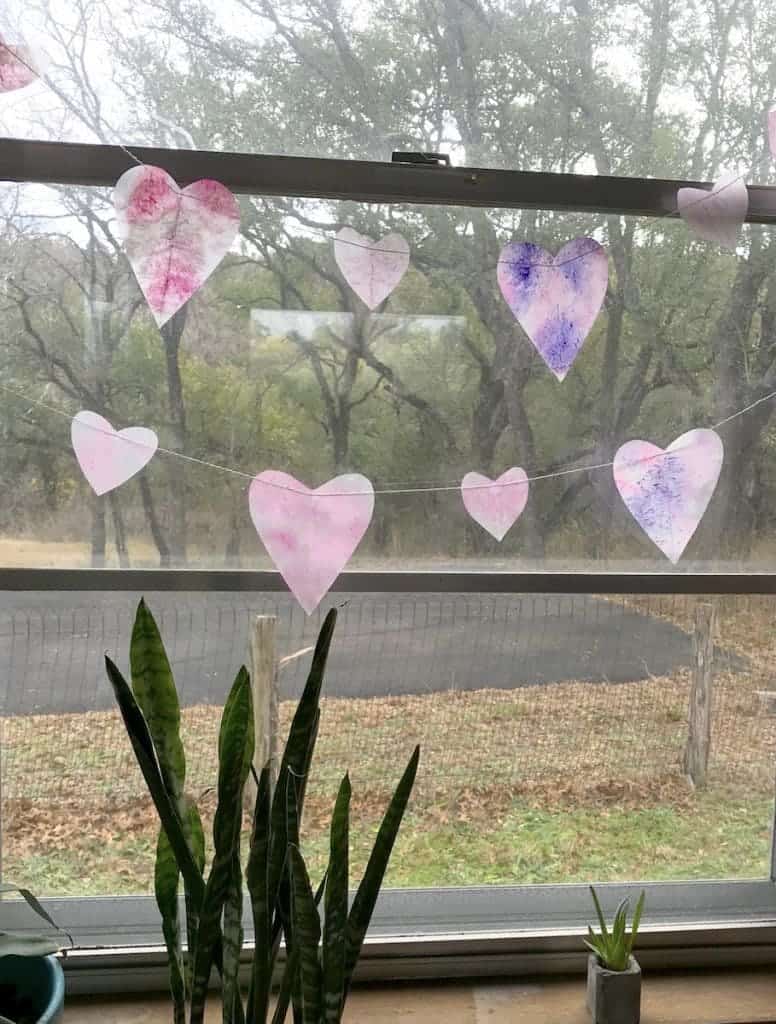
Once you’ve got your hearts made, just add a bit of glue and string and you’ve made a beautiful garland.
We used several colors on each of our hearts but you could just use one color per heart for a different look. You may have to experiment with a few of your hearts at first to get the effect that you’re looking for.
A few tips for the heart garland
We’ve seen another option to make a full sheet of melted crayon and then cut out hearts. We tried that method and found that it didn’t work as well because you can scorch the crayons.
Did you know that they’d scorch? Neither did we.
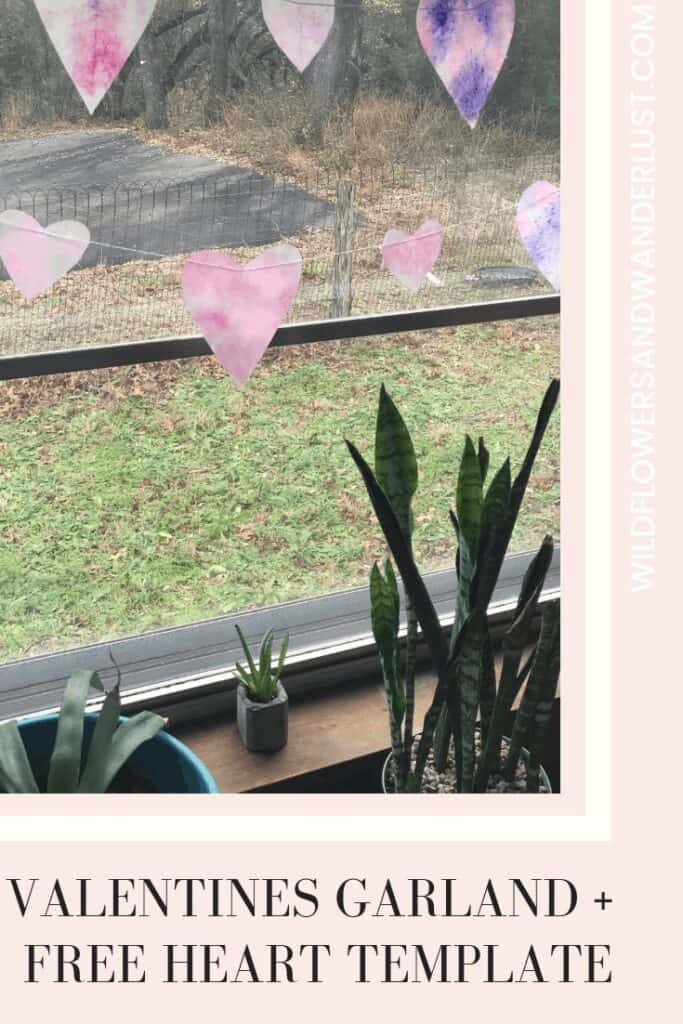
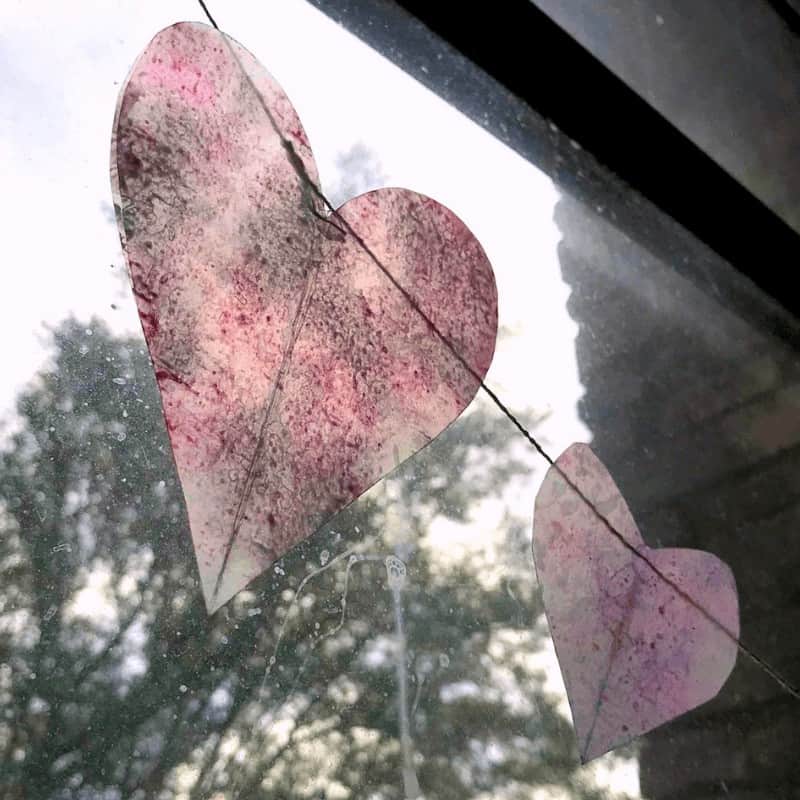
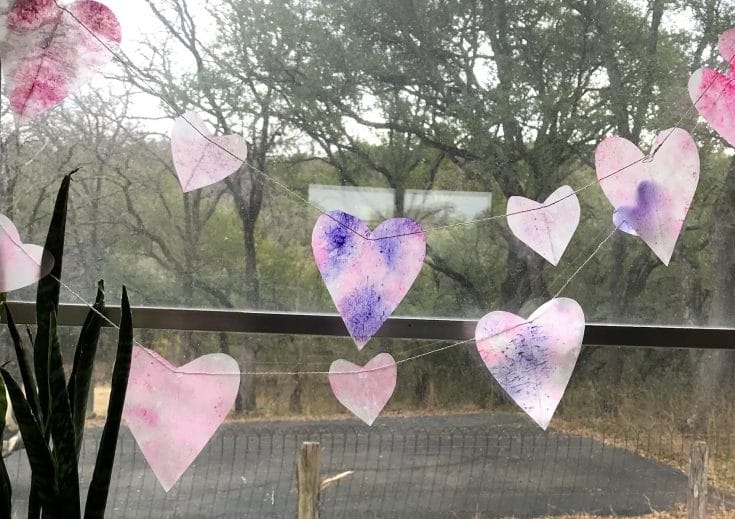
We made our valentine heart garland to hang in a window because we love having the sunshine show through it. It also looks great anywhere you’d normally put up a garland; like on a fireplace mantel or over a bed or mirror. There are endless ways to use a garland in your decor.
Just remember that they are melted crayons and if they’re in direct (hot) sunlight – well, they might melt. We haven’t had that problem but it would be pretty disappointing. And really messy….
If you liked this project you might like our other Valentine projects:
- How to make our Valentine Bath Fizzies
- More Decorating Ideas for Valentine’s Day
- Free Printable Heart Art
- Pink Popcorn
Valentine's Craft Garland
Fun & Simple Craft for a Beautiful window or wall garland for Valentines Day
Materials
- Wax Paper
- Crayons (1 Pink, 1 Dark pink, 1 Violet, 1 White)
- Hand Pencil Sharpener
- Parchment Paper or thick Craft Paper
- Twine or String
Tools
- Manual Pencil Sharpener
- Scissors
- Iron
- Hot Glue or Hole Punch
- Small bowls
Instructions
- Pick your Crayon colors (we chose pink, dark pink, violet, and white) and unwrap the crayon. Using the manual pencil sharpener, create bits of wax by 'sharpening' the crayon over a small bowl. Repeat for each color.
- Fold your wax paper in half long-ways and then fold again long-ways. Cut heart shapes so you'll be able to unfold a pair of wax hearts with each cut. We cut 2 sizes and then copied each size for a total of 6 larger hearts and 8 smaller hearts.
- Turn your iron to a medium-low setting and place a piece of parchment or craft paper on your ironing surface. Place 1 heart of a pair and sprinkle with various colors of wax in a thin layer. Place the second matching heart over the first and cover with another sheet of parchment or craft paper. Iron over the parchment or wax paper for a few seconds to melt the heart. Do not keep the iron in one spot for long. Lay the heart on a paper towel or wire rack to cool. Continue until you've completed all of the hearts.
- Hot Glue each heart to a piece of string or twine about 2-3 inches apart. We alternated large and small hearts. You could also hole punch the hearts and thread the string through.
- Hang in a window to enjoy!
Notes
The hearts can burn, so keep your iron swipes short and keep the temperature low.
You could complete this project with many different shapes and colors so get creative!
Follow us on Pinterest and on Instagram for lot’s more ideas and inspiration!