My xTool M1 Review – A Powerful New Crafting Tool
Are you thinking about buying an xTool M1? Have you even heard of this tool? We are sharing our initial thoughts about this fun new tool that we’re trying out. Follow along as we learn to use it and create great projects with it!
~This post may contain affiliate links. If you click one and make a purchase, I may receive a commission at no additional cost to you. This helps us fund creating great content for you! For more information see our disclosure ~
Our XTool M1 Initial Thoughts
We’ve been using our Silhouette cutting machine, and our second Silhouette machine for years now. It’s been a great tool for so very many projects but last year we really started looking into the GlowForge and all of its possible projects.
We do spend a lot of time doing crafts, reading about crafts, in the craft store so there are all sorts of temptations that come across our workspaces all the time.
Then along came the xTool M1.
Which got us to doing a lot of research on what these tools can do and which would be a better value for the money.
You’ve probably caught on by now that we have an xTool M1.
When the company contacted our team to see if we’d like to write a review about the tool we jumped at the chance because we were already coveting the tool!
Now we’ve had it for a few weeks and have had some time to work on a few projects, do some learning and research and we’re ready to share it all with you!
We’re going to share with you:
- Everything that comes with the xTool M1 (unboxing)
- How easy it is to set up (it really is)
- What we think so far
We’ll be sharing a few projects later to this week and we’ll update this article with links at the bottom so you can follow along!
What is an xTool M1?
If you haven’t heard of an xTool M1 that’s not really a surprise.
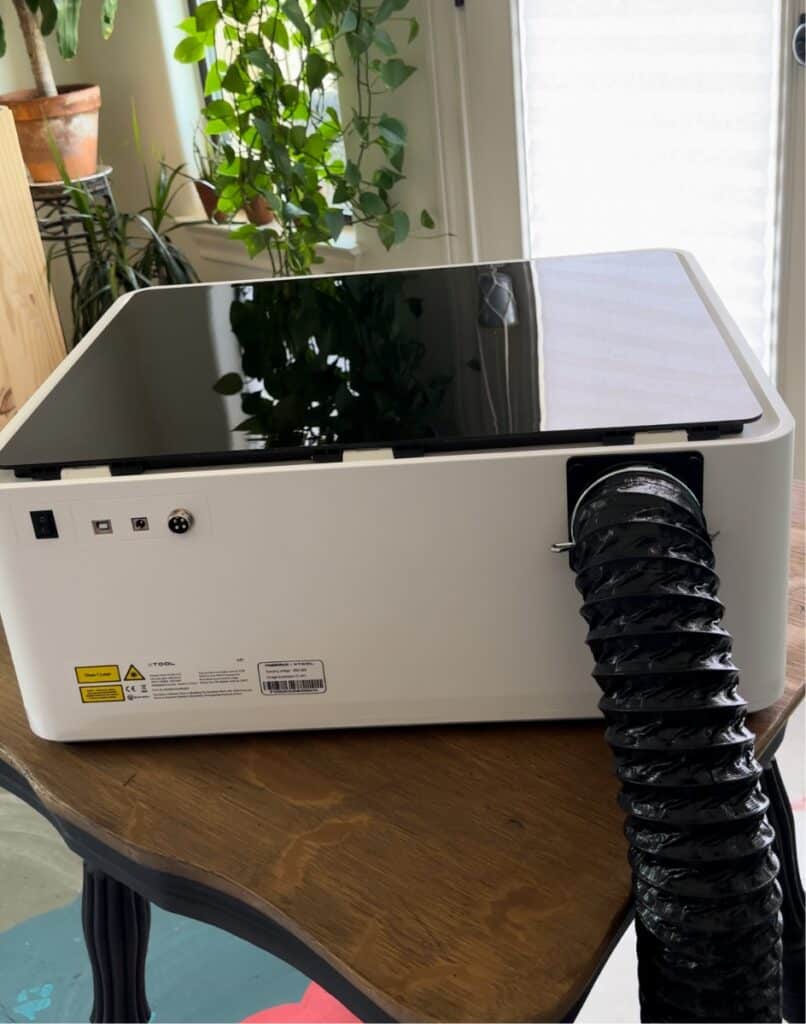
The xTool M1 is a combination machine. It has a diode laser and a separate blade which means that you can engrave and also cut all kinds of materials. You can use it like a Cricut or Silhouette but it’s also so much better.
One of the best features is the real time camera!
We also found that it was ready to go right out of the box with hardly any setup!
This machine opens up a wild world of projects that you can create and you can do it all from your kitchen table – or craft table. You can easily use it for woodworking and signs and just about any kind of engraving.
What kind of laser does the xTool M1 use?
The xTool M1 uses a diode laser.
What’s a diode laser?
Well to put it in the easiest terms it’s like a semiconductor. It makes an electrical current that can engrave or cut with its’ strength.
Diodes can be used as light emitting or laser marking. If you think about the scanner at the grocery store that would be a lighter version and a laser cutter would be a stronger version.
What Materials can the xTool M1 cut?
There are so many materials that the xTool M1 can cut but a few are: wood, paper, foam, leather, rubber and stone!
We can’t wait to try out all the different materials but the one we are most excited about is acrylic! xTool doesn’t recommend working with clear acrylic but colored and opaque can be used.
Unboxing the xTool Laser Cutter
The size of box that arrived holding the M1 was no joke! When we spied it on the porch we were a little afraid of how heavy it was going to be but we were wrong!


It’s very well packed and we got the All In One Kit as well so we’ve got lots of goodies to start working on immediately!
While there are several different laser cutters that xTool offers, the M1 is probably the most beginner friendly.
It’s easy to compare the different machines on their website and if you have an idea of what materials you’ll be working on that will really help you narrow it down.
We got the M1 Deluxe and now we are considering purchasing the air assist to add to our machine. The air assist helps with the finer details in cutting and gives a bit more power to the laser so that the cuts are cleaner and more precise.
The All-in-one Kit that we received also includes a Premium Materials Box filled with a selection (245 pieces) of materials for different projects including wood tags, wood slices, wood sheets, kraft and cardstock paper, vinyl and acrylic sheets, faux leather, metal business cards, slate coasters a tote bag and even more!
Setting Up the xTool M1
There’s very little setup required to get this machine up and running!
There’s a vent hose to attach to the back of the machine. You’ll need this to vent smoke outdoors or into a smoke purifier (which you purchase at the same time as your machine).
Then you plug in the machines and they’re ready to go!
Setting up the Creative Space Software
Now you’ll need to learn a bit about the Creative Space Software. If you’ve used another cutting machine you’re going to have less of a learning curve on this software.
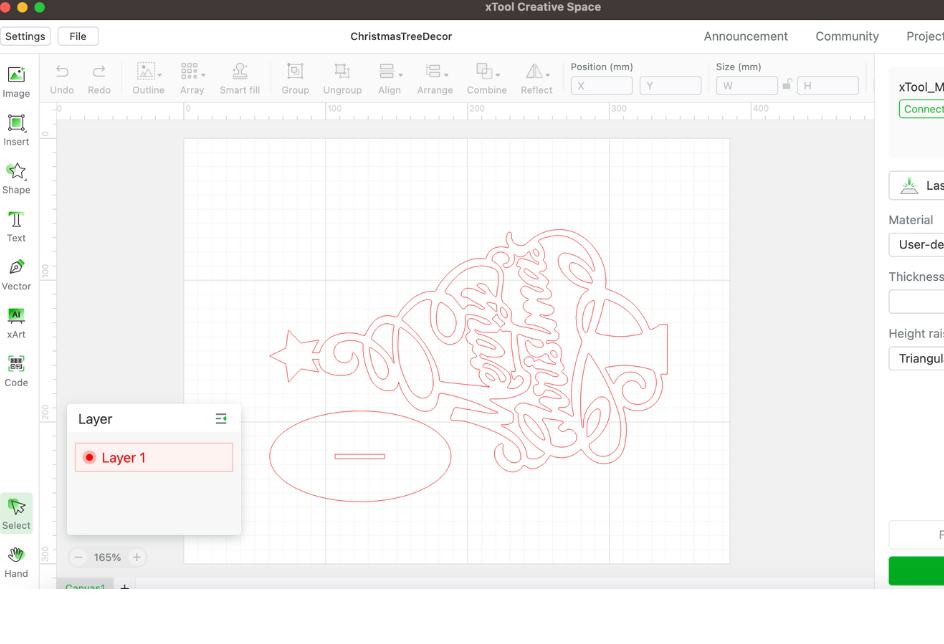
The software is being updated regularly and is not too hard to figure out, but finding step by step tutorials can take a minute, although we now see that they’ve added some directly into the design space! Yay for software updates!
We have also found that the xTool M1 Facebook Group is full of knowledgable people who are happy to share their expertise so if you get into a project and are at a loss there’s usually someone there to answer a question.
We’ve also learned a lot by watching Monkey Woodworks on YouTube. While they got their machine early in the process, their step by step tutorials can’t be beat.
Our First Impressions of the M1 Laser Cutter
We were surprised at how easy the setup was and the install of the software. We struggled to find step by step directions at first, which seemed intimidating. However once we started using the machine we figured out the need to test materials for each project.
The design gallery is a bit limited so you’ll want to find designs elsewhere to use in your creative space.
There are lots of materials with included settings so that took some of the guesswork out of our first couple of projects. Now we are more comfortable experimenting and asking questions of the group.
All in all this machine is easier to use than we originally expected and we’re having fun trying out some projects.
It’s a much bigger investment than a blade cutting machine such as the Silhouette or Cricut but the capabilities of it are so much more advance. This is the machine that you cut your teeth on before you start doing much bigger projects!
We hope you enjoyed our review – watch for our projects and check out our Instagram highlights to see the actual videos of the unboxing and projects!
The WW Team!
Follow us on Pinterest and on Instagram for lot’s more ideas and inspiration!