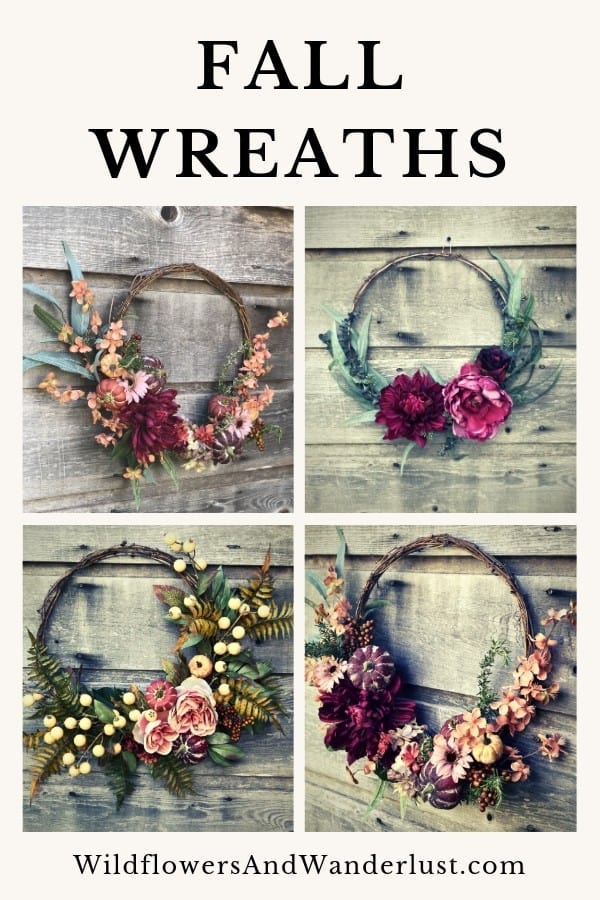
An Easy to Make Fall Wreath 3 Different Ways
Updated August 2022
We each made a fall wreath for our front doors recently, and since there were three of us working on the project we wound up with three different styles.
All fall.
All a bit different.
Of course it was so much more fun to work on a fall wreath when we had a group to help and comment on all the different styles.
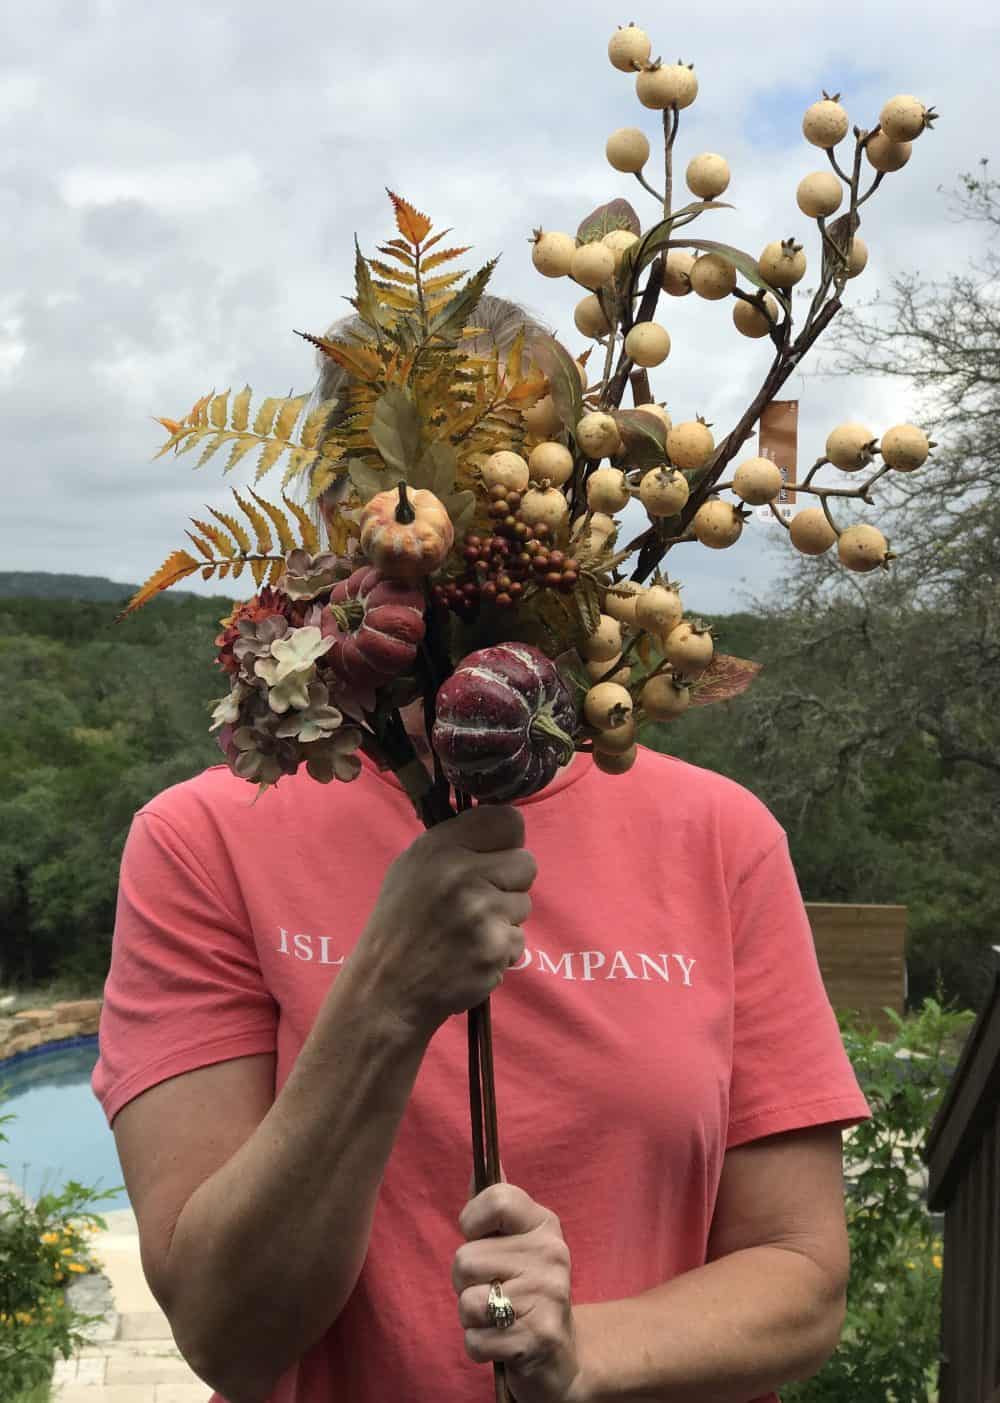
We think the key to this project is that when you start to gather your flowers together, try to hold them like a bouquet to look at them.
If you like the way they look together then you’re all set to start on a wreath.
If you’re not sure either ask the group, or keep choosing until you like what you see!
Or send us a note – you know we always have an opinion!
We used some leftover supplies from other projects and we also purchased some pumpkins picks to fill in and give the wreaths a fall feel.
~This post may contain affiliate links. If you click one and make a purchase, I may receive a commission at no additional cost to you. This helps us fund creating great content for you! For more information see our disclosure ~
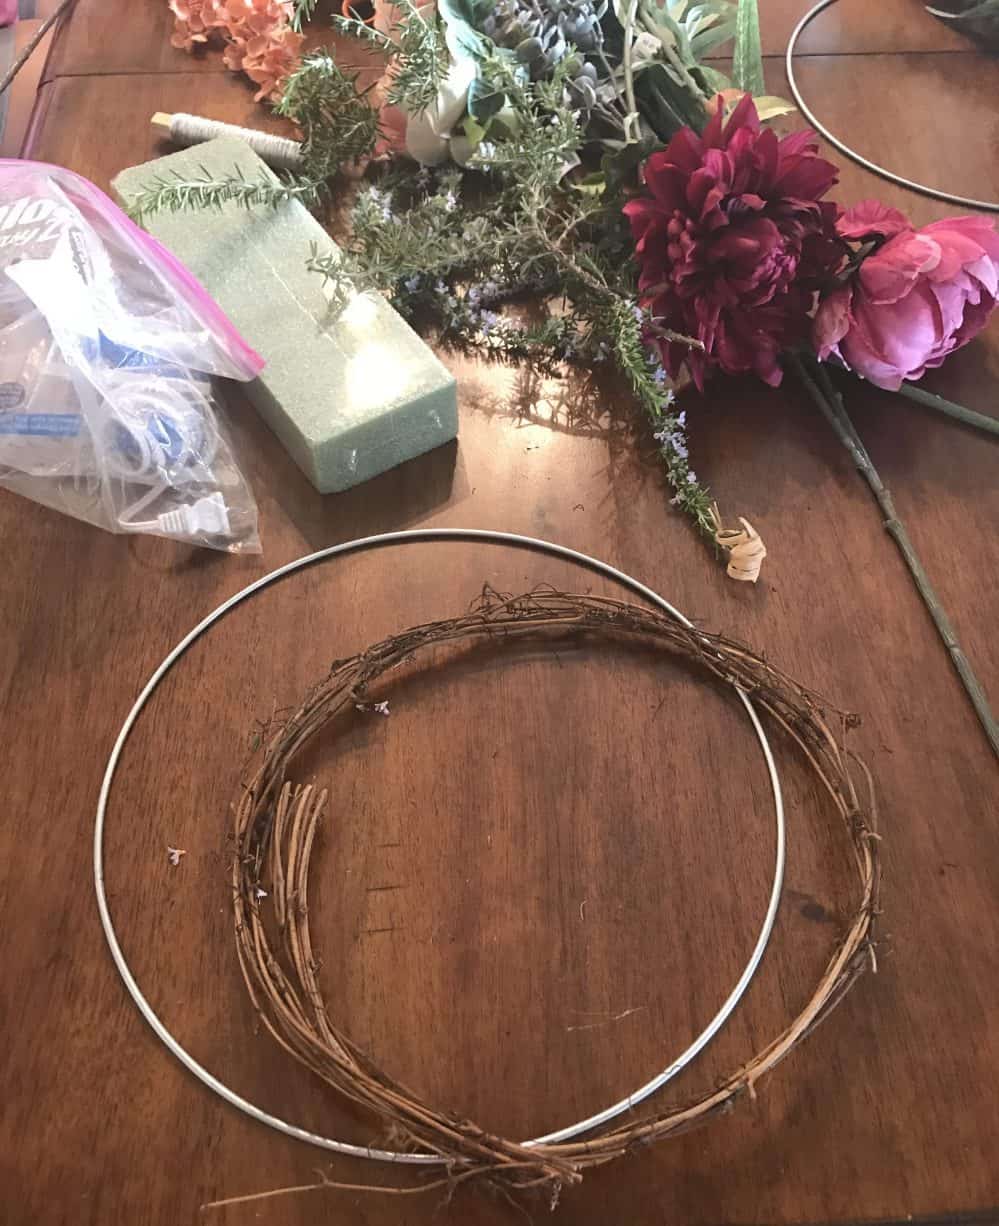
Supplies for Making a Fall Wreath
We purchased large round metal embroidery hoops to use for our wreath forms because we loved the simple and dainty look of them.
You can find all kinds of wreath forms or you can string some grapevines together and create your own wreath form.
Of course a wreath doesn’t always have to be a circle, but that it the conventional wreath style.
Once we got started, we decided to add some grapevine garland around the wreaths to give them a little more fall feeling, and also to make them look a little more substantial.
We started off wanting dainty, and then decided it was too dainty!
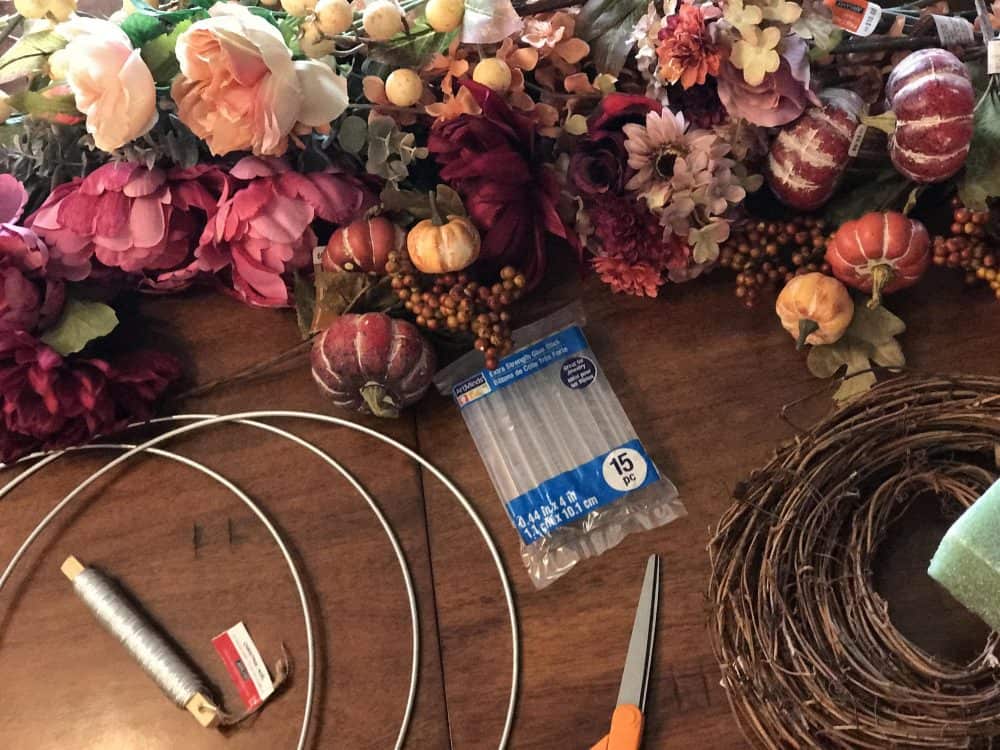
Here are the basic supplies that you’ll need to get started:
- Wreath form – We recommend these metal macrame hoops for a nice look


- Grapevine Garland
- Assortment of flowers, berries and leaves (as least 2-3 stems of each of your choices)


- Scissors
- Glue Gun and Glue Sticks
You’ll need the wire cutters for trimming faux florals. Scissors aren’t usually strong enough and the wire cutters will save you time and energy. But be sure to be careful since the edges can be really sharp.
We used floral wire to attach the grapevine to our wreath form and a hot glue gun for adding the flowers once we had the base built.
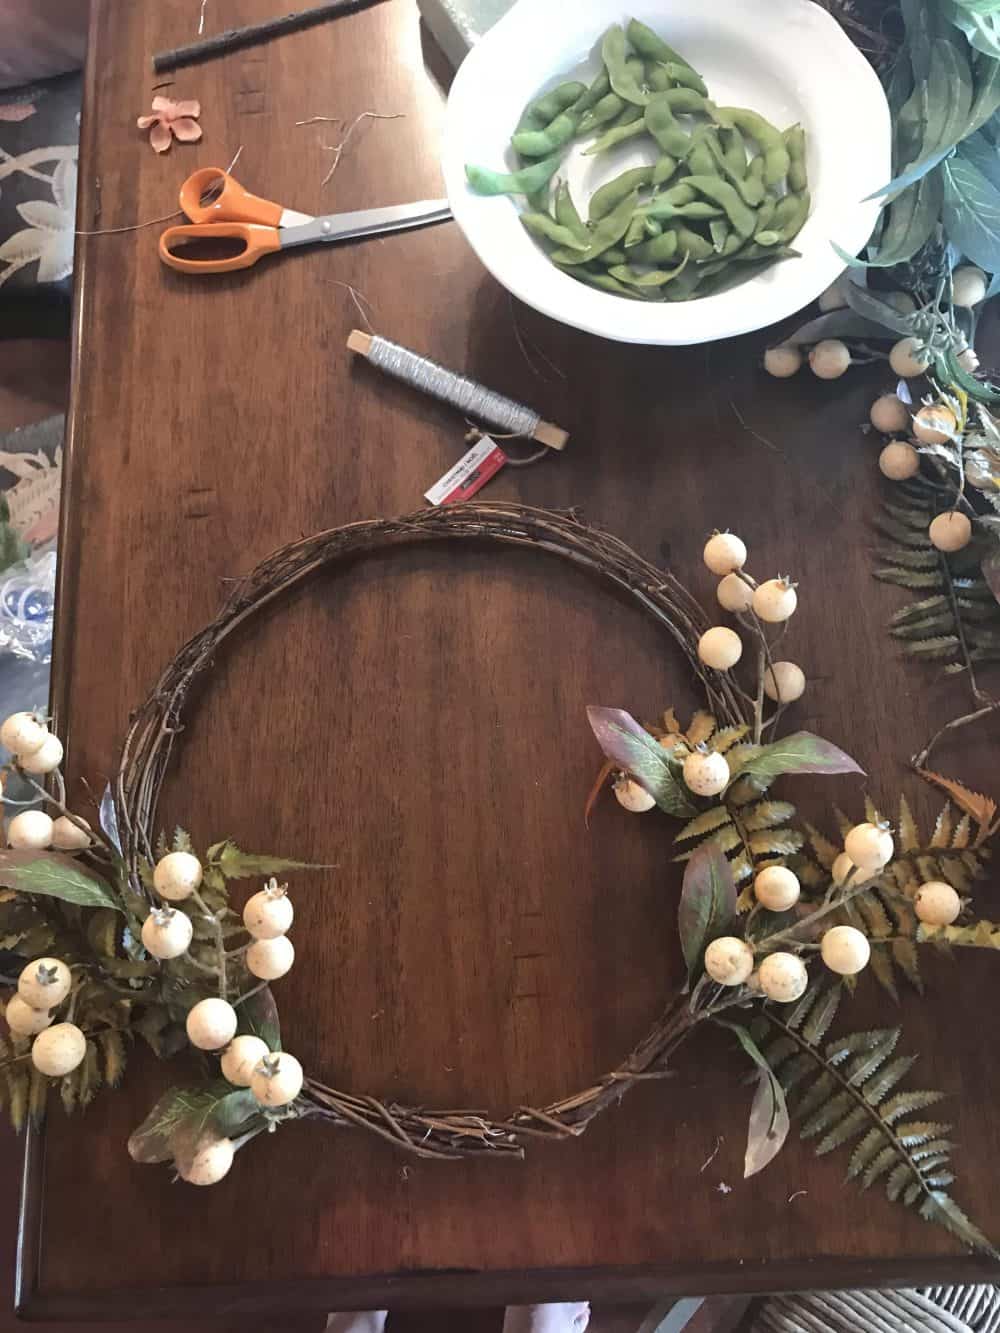
Step One for the Fall Wreath
Start off by wrapping your grapevine around your wreath and adding a bit of floral wire to hold it on.
You’ll probably need to add floral wire in at least 3-4 spaces for it to be secure on your wire.
If you want to use your wreath form without covering it then just skip this step and go straight to adding flowers!

Step 2 for the Fall Wreath
Lay your flowers out around your wreath form so you can get an idea of what they’ll look like when you add them.
It’s a good idea to lay them around your wreath and then step back and look at them to see how they look from a distance.
Then keep rearranging them until they start feeling right.
This is the creative part!
Don’t worry if it takes a bit to get the right feel. Take your time and add and subtract items before you start using glue and wire.
Believe us, it’s much easier to make a fall wreath by leaving everything loose than it is to wire or glue it all together and then be unhappy with it.
Step 3 for the Fall Wreath
Once you have a pretty good idea of which pieces you’ll use and how you want it to look you’re ready to get started.
This is the fun part!
Take your longest stems and lay them out on either side of your form. Trim the stems so that they’re not too long. You can leave a bit of extra stem on them but you don’t want your wreath to get too heavy or thick in one spot.
Then, you’ll want to attach these stems with floral wire.
Step 4 for the Fall Wreath
Now it’s time for snacks!
Never ever forget your snacks (in photo)!
We simply cannot craft without some snacks but at least you caught us being healthy with some edamame!
There’s probably a champagne glass that’s right out of sight in the photo though!
It’s important to keep your energy up when you’re crafting!
Step 5 for the Fall Wreath
Now it’s time to start layering in the rest of your decorations onto your wreath form.
If you laid out the pieces that you’re using it should be easy to trim them and add them to your wreath.
Then just continue to add more leaves and flowers to fill in any gaps and to give your fall wreath a full and balanced appearance.
When you are getting close to finishing it’s a great idea to actually hang your wreath up to look at it.
Once you lift your wreath up to hang it you may notice that some of your pieces aren’t secured well or that there are still some spots that might need a little more attention.
Fall Wreath Making Tips
We used floral wire for the bigger pieces and then cut the stems completely off and used hot glue for the finishing pieces.
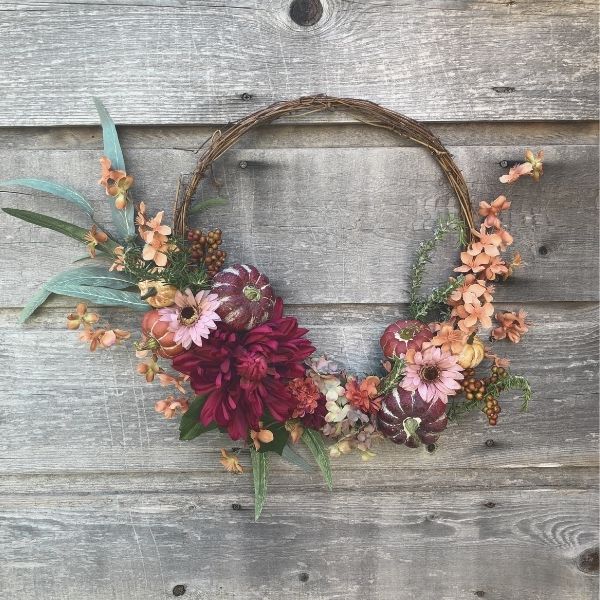
Mums are a great seasonal flower for fall and you can find them in so many colors.
We added in some dusty greenery and dark pumpkins for a little more interest.
It helps to back up and look at your wreath throughout the process.
If you can hang it up while you’re working on it that’s even better. Even if that just means that someone holds it upright so that you can check it out.
Once you’ve got the first round of flowers and leaves attached, hanging your wreath will allow you to see how the pieces lay when they’re actually hanging.
This may mean that you’ve got your wreath up on a door or nail, and then back onto your table while you’re working on it.
Of course that’s why you need to keep your energy up with snacks!
When you’ve got all your pieces arranged the way you like them it’s time to hang it up!
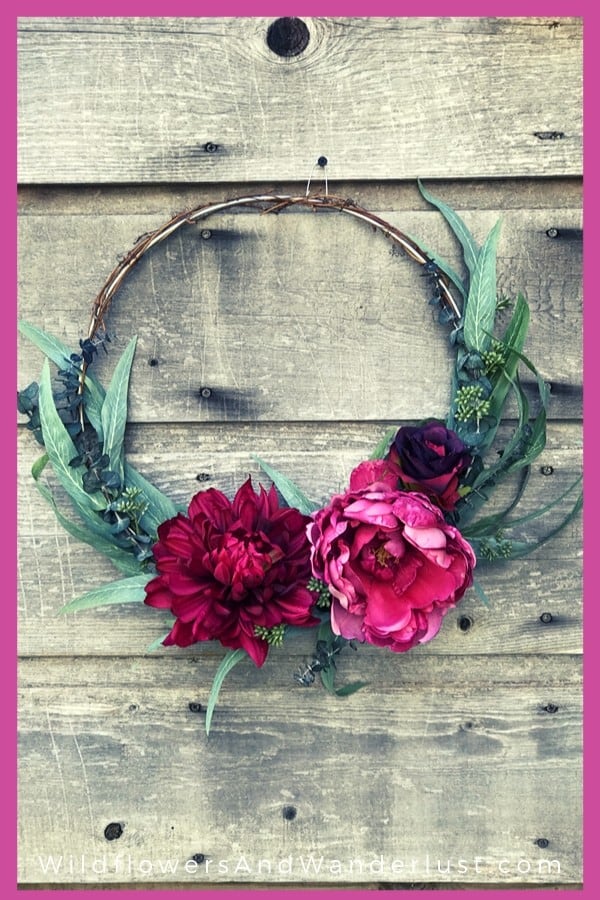
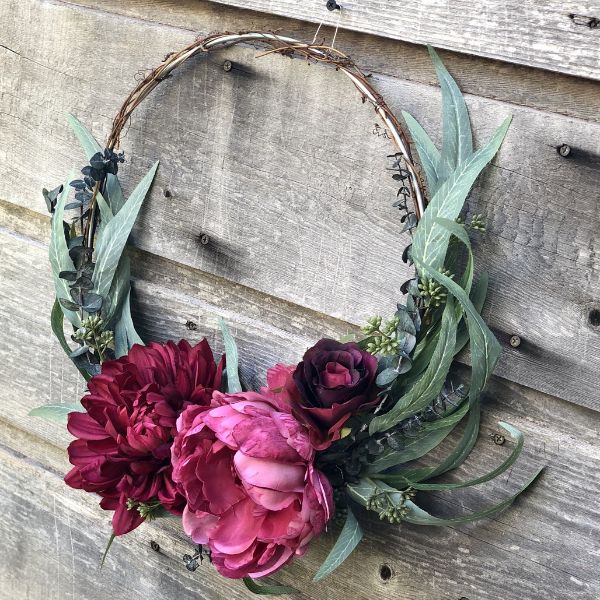
You can see that each of our wreaths look completely different when we finished them!
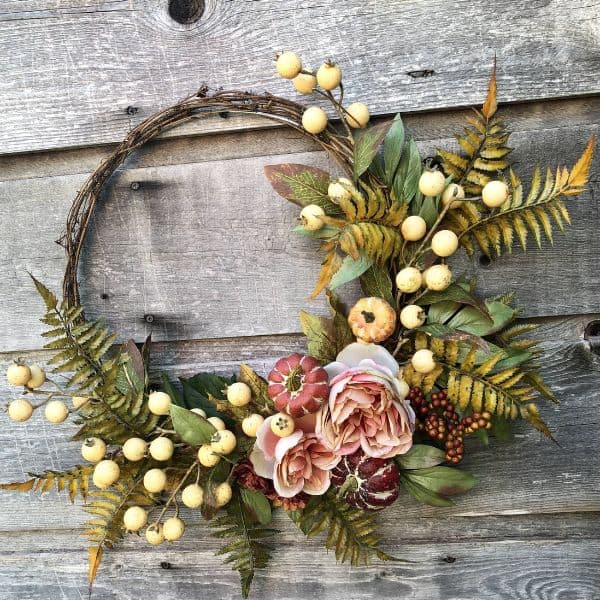
The peony’s are always a beautiful flower and they look great in any season. We kept it simple by using a couple of colors and greenery for this wreath.
These bright yellow berries add a lot of interest to the lighter colored wreath.
When we finished our wreaths we decided that we loved how our colors looked against the worn barn wood on our little guest house. That’s the background we used for the finished photo’s.
Now they’re all going home to hang on the front door’s!
Want some more Fall Decor Ideas? Be sure to check out:
How to make a Succulent Pumpkin
Halloween Pumpkin Ideas
How to make a Succulent Wreath
A quick and easy no sew Burlap Runner
What are your favorite fall colors to use in your decor? Have you made a fall wreath for your front door before?
Share your projects with us in the comments below – we’d love to celebrate with you.
Follow us on Pinterest and on Instagram for lot’s more ideas and inspiration!