How to Create a Stunning DIY Succulent Pumpkin
A fall pumpkin centerpiece made with succulents will be the highlight of your table. Or your porch. Follow along to see these beautiful creations.
Create a Fall Pumpkin Centerpiece
Last weekend, I joined my mother-in-law and sister-in-law for a workshop hosted by Hip Horticulture to create our own DIY Succulent Pumpkin.
It was so easy and fun that I thought I would share all the details so you can create your own at home!
It turns out that our instructor was recently featured in Texas Highways Magazine for her beautiful creations. Check out the article for some stunning projects (and some great inspiration) for your supply gathering.
Other women in the workshop mentioned that succulent pumpkins they received last year lasted well past the following New Year, so keep that in mind while planning for yours.
We all brought a variety of pumpkins for the class, but I would recommend picking one that’s a bit flatter on top. This type will hold more items and it was easier for me to place items and step back to see how they would look before committing with the hot glue gun.
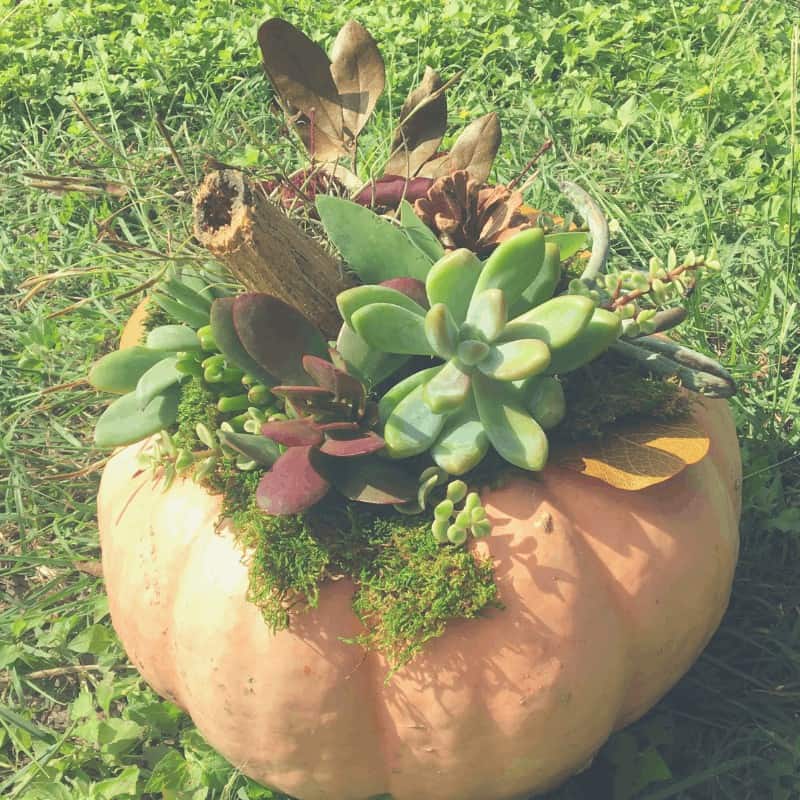
Here is how it turned out!
~This post may contain affiliate links. If you click one and make a purchase, I may receive a commission at no additional cost to you. This helps us fund creating great content for you! For more information click here ~
Supplies for a DIY Succulent Pumpkin
- Pumpkin or gourd – look for one with a flatter top
- Sheet Moss
- 4-8 small succulents
- Fall leaves, twigs, nuts or berries
- Hot Glue Gun and glue sticks
- Spray Glue
Assembling a DIY Succulent Pumpkin
We didn’t get photo’s as we were making the pumpkins so I don’t have a step-by-step to share with you but it’s an easy project when you have all of your supplies gathered.
Be sure the top of your pumpkin is clean and dry before you start.
Nothing will stick to the top of your pumpkin if it’s dirty. You can use soapy water or just a wet paper towel to clean off the surface of your pumpkin.
Start With Spray Glue
The spray glue works great to lay down your sheet moss on top of your pumpkin. If you don’t have any spray glue then feel free to just dab a little glue from your glue gun to place your moss. You can go back and touch it up later if there are loose pieces when you get finished.
After you coat the top of the pumpkin with spray glue add a layer of moss that is 1-1.5 inches thick.
The moss becomes your base and the succulents will grow into it. It also helps hold in a bit of moisture for them. You’ll want to make a nice thick layer of moss to place your succulents in.
If you decide to dismantle your creation later, you can just pick the whole thing up off your pumpkin and move it into a planter.
After you add a layer of moss, add succulents and fall decor
Use your hot glue to place any of your larger fall items onto the moss and then start placing in your succulents.
You’ll want to be sure to place your succulents close together because they will shrink up a bit at first. Then you can fill in any bare spots with more fall foliage or twigs to finish it out.
Just put a dab of hot glue on a small area of your succulent to hold it in place. We promise they won’t mind!
Be sure to step back from your project a few times and view it from a distance. That can help you see any spots that might need extra attention.
We’ve got a full tutorial on making a Succulent Wreath that has more tips on cutting and gluing succulents.
These are super hardy plants so don’t be afraid to clip them and glue them into your moss!
Caring for your DIY Succulent Pumpkin
There are a few things that you need to be mindful of about caring for your succulent pumpkin.
Your creation will last longer if you use it indoors. Generally your indoors is going to have less temperature swings or critters that would bother it.
We have to be careful because the deer love to eat most plants and pumpkins. These are definitely an indoor decoration at our house.
If you’re planning to display your pumpkin on your front porch or outside you’ll want to be sure that it’s in a protected area and doesn’t get direct sunlight on it. Direct sun can dry out your succulents very quickly and they’ll shrivel up and look real sad.
The succulents and pumpkins don’t like freezing temps either so be sure to keep an eye on your fall weather. You don’t want to walk out on your porch one morning to pumpkin mush.
Watering Your Creation
You can use an eyedropper or a spoon to water your succulents. They don’t like having water on their leaves but the moss will hold enough moisture for you to water every 7-10 days, depending on conditions. Try to treat it like any other houseplant you care for.
If it’s really dry or warm you may need to water more often. But it’s okay to let everything dry out between waterings.
At the end of the season
At the end of the season you can use a knife to lift the moss and roots off the pumpkin and relocate them into a planter. Your succulents should be just as happy to be moved as they have been on top of your pumpkin.
Many gourds will last for 6 months or more with a little bit of care so these are an easy and long lasting decoration.
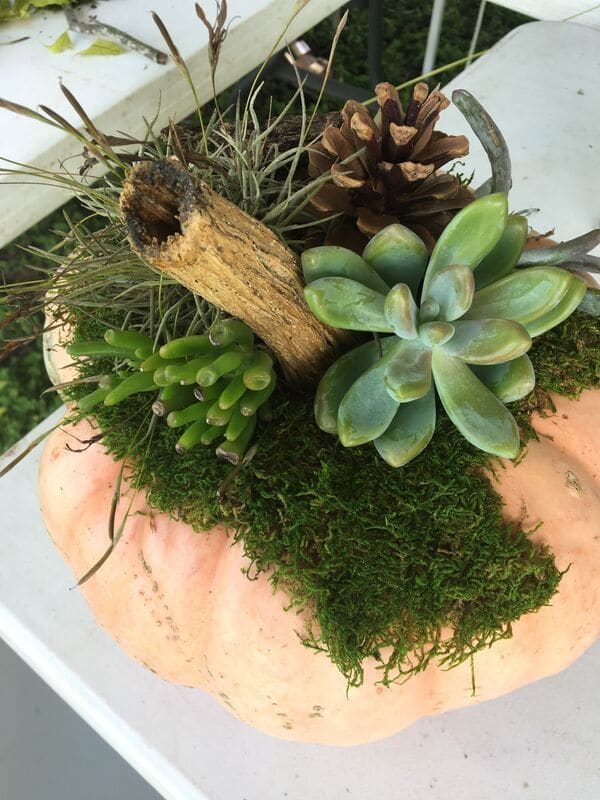
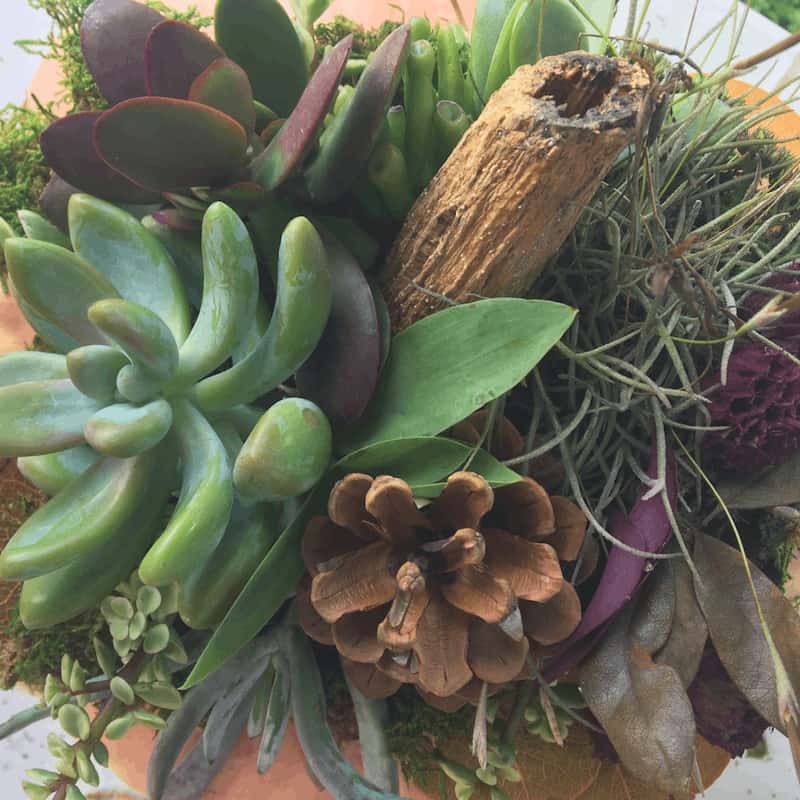
Here’s my finished project!
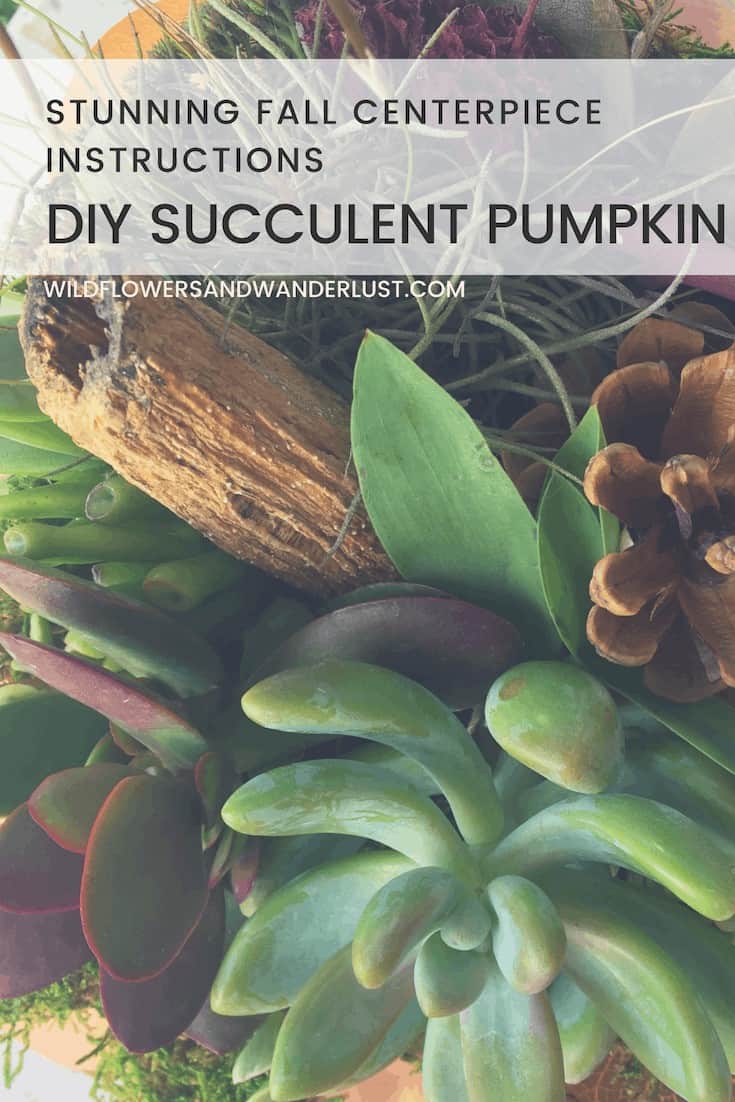
…and here is a close up version! Our instructor recommended placing the succulents quite close together to account for some shrinkage as they settle in.
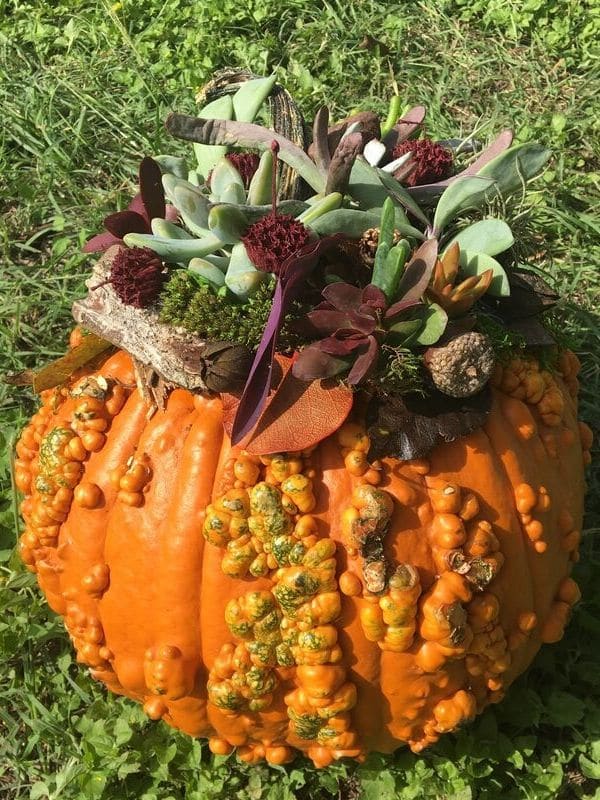
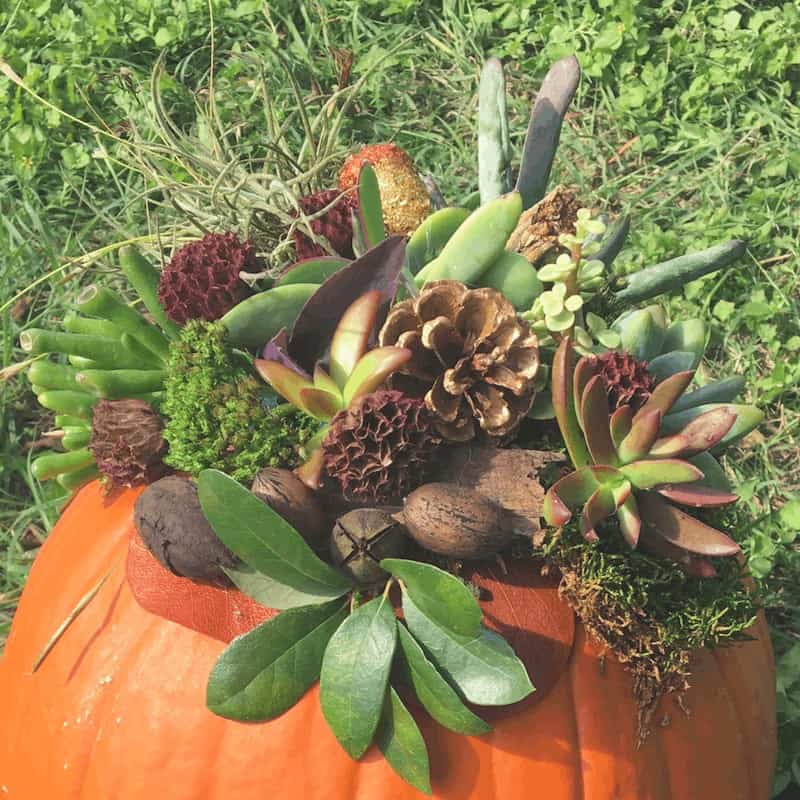
One last one to show you! This is a pumpkin that we all teamed up on together. It was fun to add in some bark pieces, nuts and leaves we collected in the area.
See below for the full details on how to create your own DIY succulent pumpkin today!
I would love to see your creations so make sure to comment below with details and pictures.
Follow us on Pinterest and on Instagram for lot’s more ideas and inspiration!
DIY Succulent Pumpkin
Create a stunning Fall centerpiece for outdoors or indoors with this DIY Succulent Pumpkin tutorial!
Materials
- 1 Pumpkin (preferably with a flatter top)
- Sheet Moss (est. 6 inch x 6 inch)
- 4-8 Mixed Succulents (I used live succulents, but fake would work!)
- Fall Leaves
- Twigs
- Other assorted Fall Items you like
Tools
- Spray Glue
- Hot Glue Gun and Glue
Instructions
- Wipe your pumpkin clean and dry it completely.
- Spray the top section of your pumpkin with spray glue and pat the sheet moss down. This will be the base for the other additions.
- Hot glue any larger fall items you would like included first to the sheet moss. I chose a ball moss and pine cone as the main larger items.
- Place succulents largest to smallest. If pulling succulents from the pot, clip at the base of the plant. Hot glue the bottom tip of the stem to the sheet moss. The succulents will shrink some, so crowd them together for a lasting look.
- Fill in any holes with smaller fall items. I added leaves around the base of the sheet moss and filled a few holes with mum clippings.
Notes
Hunt around outside for Fall items to mix onto your pumpkin topper! I found some great ball moss on the ground.
Seed pods, dried flowers and even small gourds would make great additions. I chose to put the large items on one side of the pumpkin, but you can place evenly if you'd like yours to be more symmetrical.
Keep inside for a longer lasting centerpiece. If succulents begin to look dry, use a dropper or spoon to wet the sheet moss. Never water your succulent leaves directly.
You might also be interested in:
Be sure to save this to Pinterest so you can find it later!