
How to Make A Unique Macrame Coaster
If you’ve ever wanted to try your hand at macrame then we’ve got an easy and unique project for you to try. This macrame coaster is quick project and when you’re done you’ll have a pretty coaster that you can use!
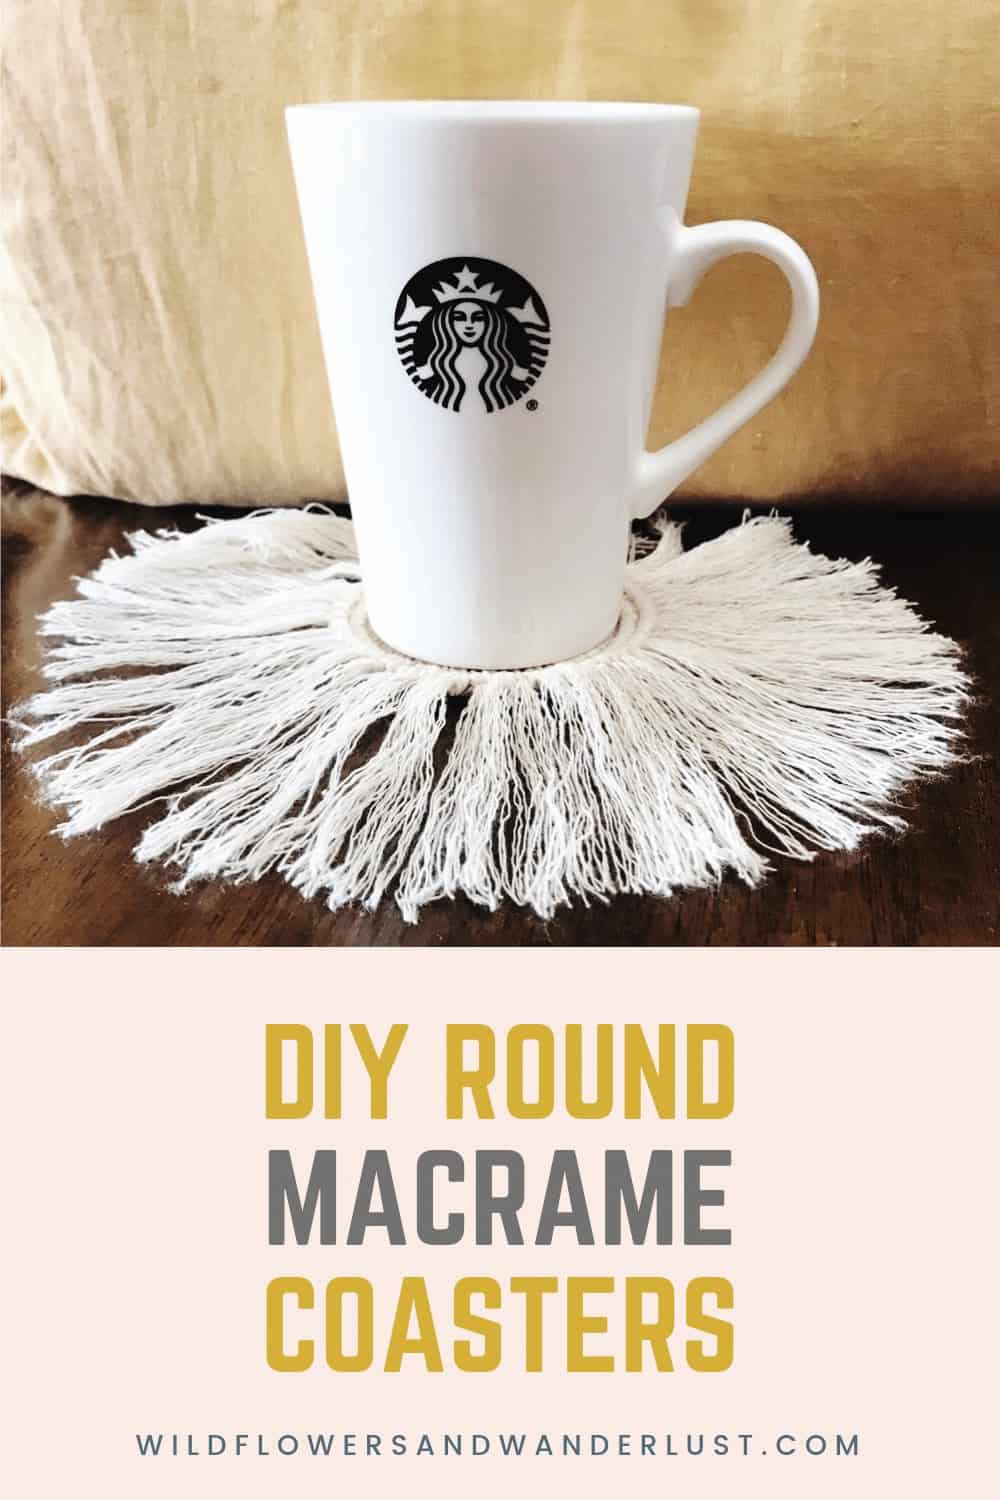
Make Your Own Pretty Round Macrame Coaster Set
We have been seeing these cute little round macrame coasters all over the place and thought “well that should be quick and easy to make right”?
Well sort of.
Easy, yes. Quick, not as much.
Who knew that just tying knots over and over in the same pattern could take so much time? I mean I guess if you macrame (is that a verb?) all the time then you clearly understood this better than we did.
But tie knots we did and voila! A cute little round macrame coaster was the result.
And after making one of these we could be soooo much faster next time, so maybe that’s the key. Experience.
~This post may contain affiliate links. If you click one and make a purchase, I may receive a commission at no additional cost to you. This helps us fund creating great content for you! For more information click here ~
So let’s get started!
Now, this is our first attempt at this project and it didn’t turn out exactly as we’d planned so we’re going to share it and give you some pointers on how you can make yours look better.
And on the upside, you can make this project while binge watching your favorite show.
It was also an inexpensive project to make.
Really, because we know you already own scissors and a ruler so your only expense is the macrame cord. And who knows, maybe you already own some of that too. (Don’t worry, we won’t tell)
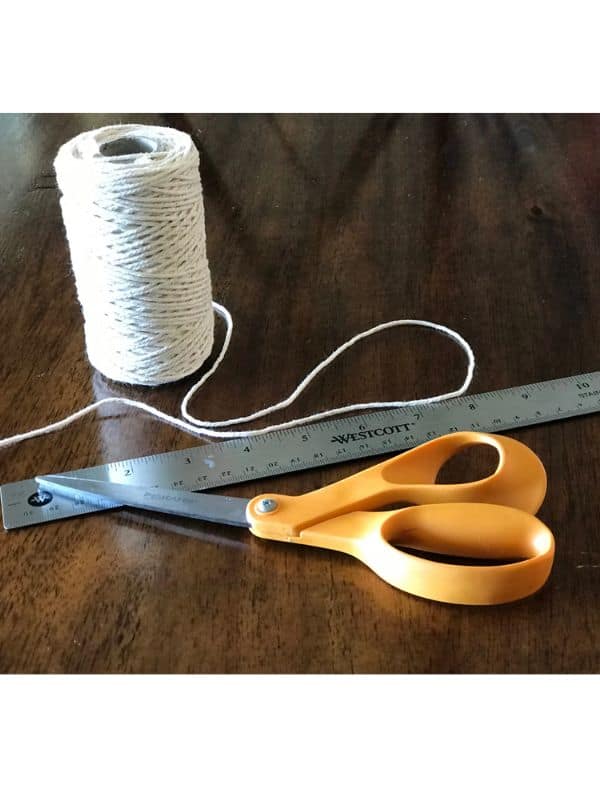
Supplies For a Round Macrame Coaster:
- Scissors
- Ruler
- 3mm Cotton Cord
- A way to secure the cord (we used a pin and a cork coaster but tape works too)
- Comb
How to Make Your Boho Macrame Coaster
To Start this Project
You will start out by measuring out your cord into lengths. We started with
- 1 – 80″ length
- 5 – 30″ lengths
You’ll add more lengths of cord later but it’s easier to know the correct length as you move along into the project and not waste any of your cord.
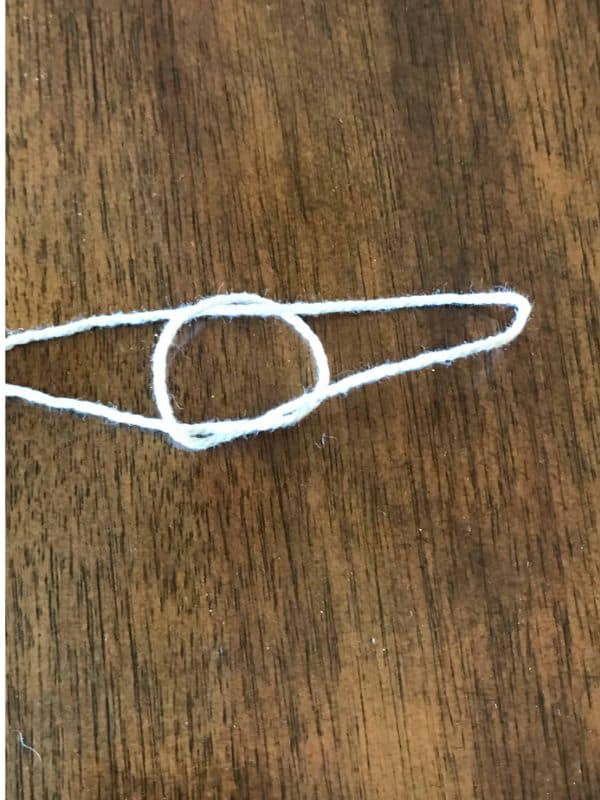
Make Your First Loop
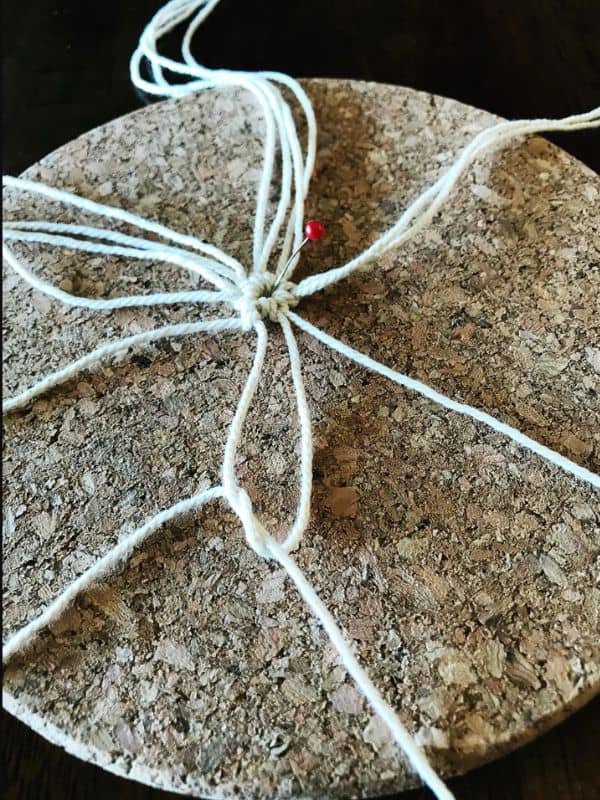
Start by taking your long length of cord and measure down 15 inches. You’re going to tie a slip knot at this point to start off your project. Turn the top of your cord over to create a loop, then push the long end of your string through in a loop. This will give you a loop of string with a sliding knot on it.
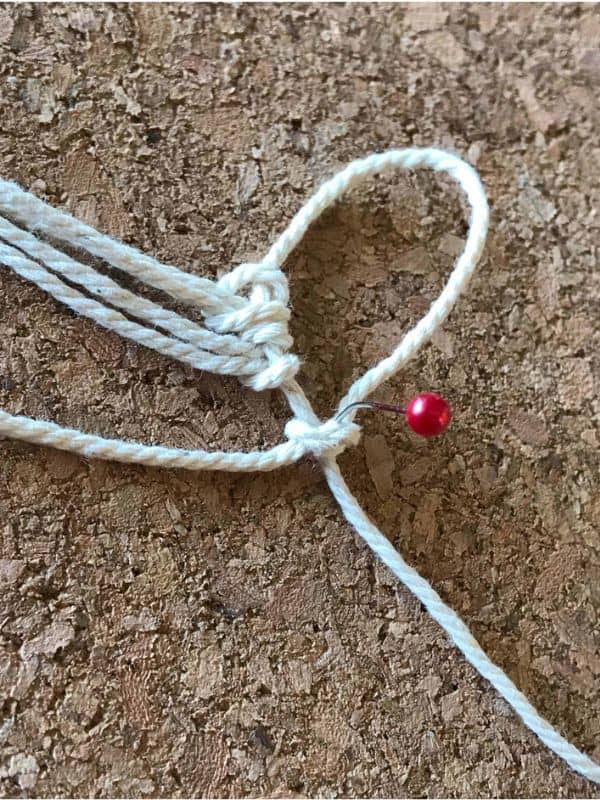
We used a pin and secured our project to a cork trivet, but you can tape your project to the table if that’s easier. You will probably want a way to secure it in the beginning so that you can see the project a little better.
Next, take one of your 30 inch strings and fold it in half. Place your looped end under the string of your main circle, pull the strands through and you have a larks head knot. This can also be called a cow hitch.
Now see how much you’re learning already? Did you know about larks head and cow hitches? We always like to throw in a little bonus when we’re teaching you a new skill!
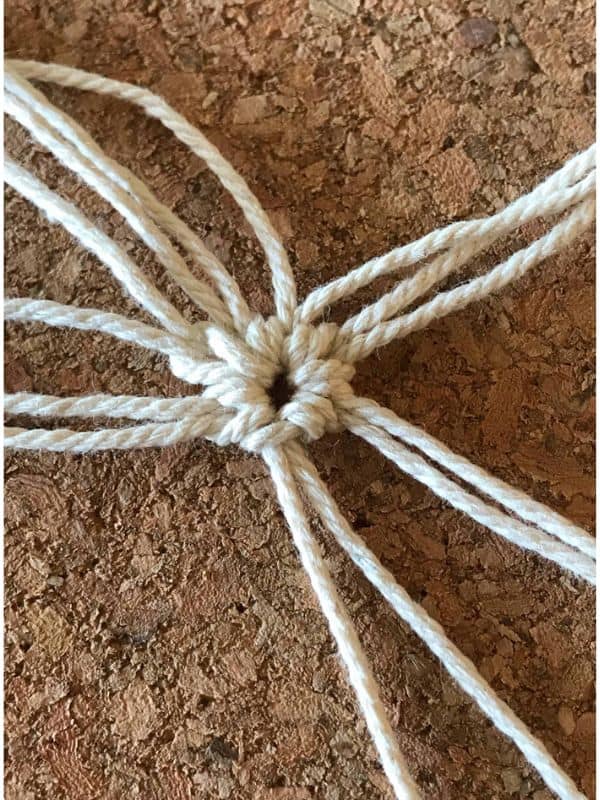
Take the remaining 30 inch strings and repeat the process until you’ve got them all in a pretty line inside your loop!
Once you’ve gotten all those tied into your main loop you’re going to tighten up that slip knot and that makes the center of your project! Then you will start tying knots around that!
Just pull on the long end of your cord until you’ve tightened your middle into a circle.
Now to get started on the remainder of your coaster!
Next – tying lots of knots
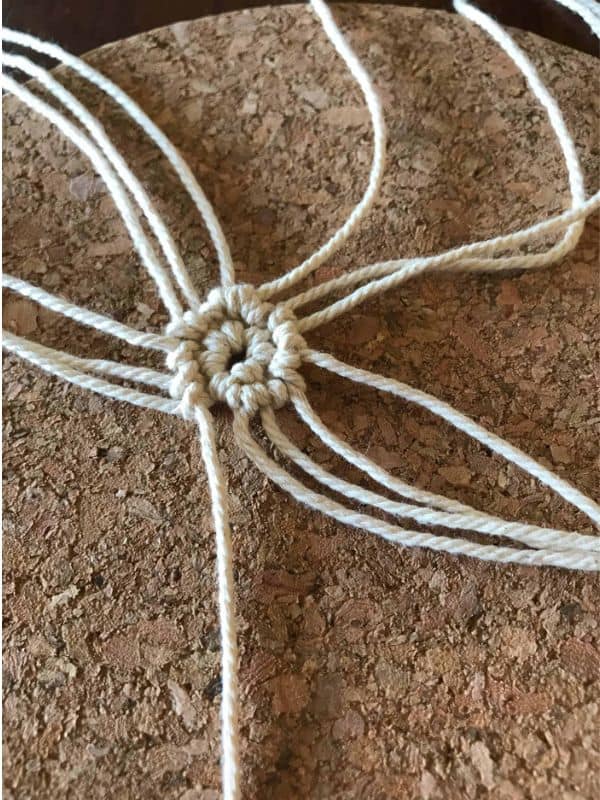
Your long cord is going to be your base. The entire coaster works its way around your base cord and it will be the main cord for the entire project. If you take a break and come back you should easily be able to identify the base cord (bonus).
The base cord will lay over your next cord and you will tie a half hitch. Just lift the cord over your base cord and push it through.
The key at this point is too make sure that your half hitch is not a half knot.
It needs to make a loop and not a twist. You can use a finger to direct the topside of the loop as you are tightening it so that the loop stays on top. When you tighten it should make a line not a twist.
Now if you look closely at our finished pictures you can see that we weren’t careful about this in the beginning and the first few rings of our coaster are not perfect loops like they should be. So learn from our mistakes (because we aren’t going to untie the whole thing now!)
Pull that first one up and tighten it and then do the same thing (with the same cord). This is a double half hitch.
Then you will move to your next cord and repeat the process. Your base cord is on top and your working cord is underneath. Half hitch, half hitch. Next.
Work your way around to your starting point.
Once you’ve gotten back to your starting point you’ll notice that there’s a gap between your cords. The base cord has been really close to the working cord each of the other spots but now you need to widen your circle.
Add Cords
So we’re going to add another cord to fill the gap. Cut a 25″ cord and fold it in half. Tie it in a larks head knot on your base cord. Just like you did at the very beginning.
Then you just continue with the half hitch, half hitch on each cord going around in a circle, adding more cords as needed. This is the entire project.
When to add more cords
You will now add more cord as needed. Each time you get to a gap that seems large, cut a cord, fold it in half and tie a larks head onto your base cord. By large we are talking about maybe 1/4″. A noticeable gap. When you add a new cord to it your circle should fit together nicely.
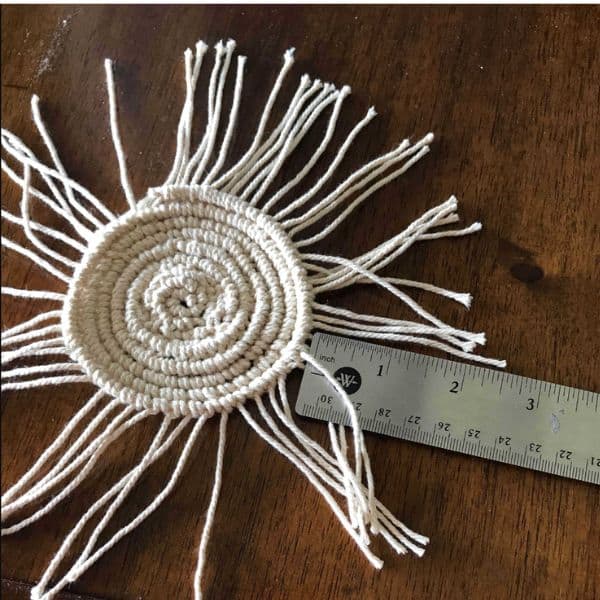
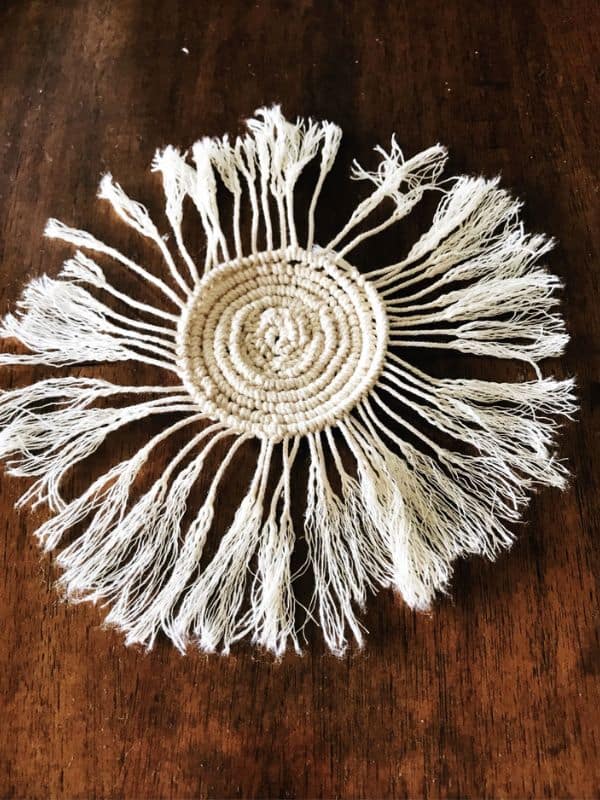
It may be after every 3-4 cords, this is how you continue to widen your circle. If you don’t continue to add strands you will wind up with a very tight center that won’t lay flat. (see photo below, we didn’t add enough cords in the beginning).
It becomes less important to know where your actual start is at this point since you will continue to add cords as needed instead of each time you wind around to where the start of your last circle is.
Be sure to cut your cords a bit shorter as you go around so that you’re not wasting a lot of cord. (tip – measure your working cords and double that amount).
To Finish
Once your round macrame coaster is the width that you’re happy with you can add your finishing touches. We read many places to make the coaster 4 inches across, but we measured all the coasters in our houses and they were between 3-3.5 inches. So we finished at just over 3 inches of the interior.
Then we cut our fringe. We used scissors for this portion of it but if you have a rotary cutter that’s definitely going to be the best tool for this job. You can just lay this on the mat and zip around it pizza style.
If you’re using scissors you’ll have to pick up the strands and cut. Not a hard job, just takes a little more time. We think that around 2 inches is a nice amount of fringe to make on the outside of the coaster.
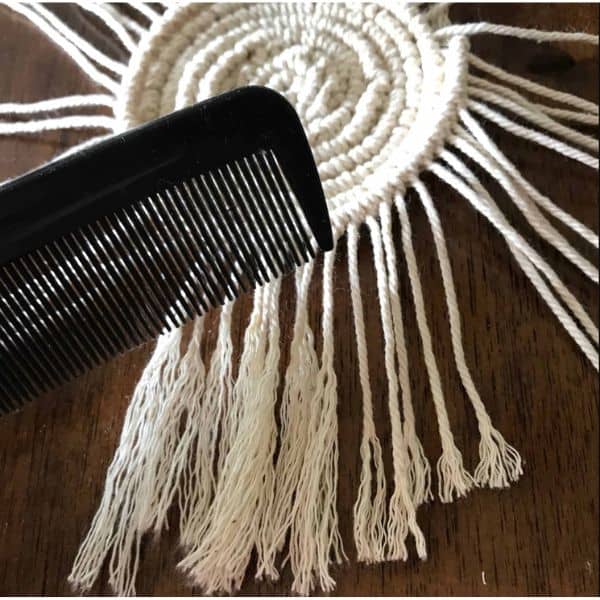
Now you just use your comb and comb out the strands to create the fringe on the outside of the coaster.
Work your way all the way around and just keep combing until you are happy with the finish you’ve achieved.
Some people like the look of their coaster with the fringe only half combed out, and this is what that looks like. We started with that and then decided to go ahead and finish combing the rest of the fringe out to make it super fluffy.
Once you’ve finished combing your fringe you can trim up any spots that don’t look perfect. You may wind up with a section that’s longer or just a few strands that need to be trimmed.
And there you have it – a round macrame coaster!
And if you’re using the macrame coaster you can’t tell that our center didn’t turn out perfect.
Don’t forget to keep adding cords as needed. If you look at our photo you will see that the inside is very tight and doesn’t lay flat, it also isn’t perfect on the half hitches. It got better as we kept working so this is going to be our sample and now we’re off to make a nice big coaster for a pot!!
If you like this project check out all of our neutral macrame wall hanging ideas and macrame projects to try!
If you’d rather watch this being made we like this video the best.
Follow us on Pinterest and on Instagram for lot’s more ideas and inspiration!
And if our instructions aren’t clear or you’ve got a question be sure to post it in the comments below and we’ll do our best to answer it asap! Pin this post to your favorite Pinterest board so you can save it for later!


WONDERFUL Post.thanks for share.
I love the finished piece with the fringed look. Thanks for posting